


Free CME credits
Both our subscription plans include Free CME/CPD AMA PRA Category 1 credits.


Background
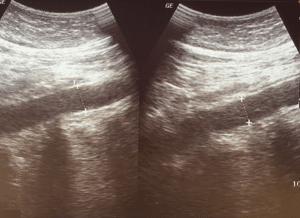
Ultrasonography at the bedside, particularly abdominal ultrasonography is another medical imaging technique that has received much consideration in recent years.
Portable ultrasound scanners are employed to do fast and targeted examinations of the organs while the patient is on bed.
Bedside ultrasonography gives real-time images and improves clinical decision-making as it takes time to image, assess, and come up with a decision at the patient’s bedside.
Transportable ultrasound machines are smaller that enables them to be taken from one location to another used in situations within or outside the healthcare facility.
Indications
Ascites Detection
Cholelithiasis
Gallstones
Acute or chronic cholecystitis
Bile duct obstruction.
Stones in the kidneys and bladders
Suspected urinary blockage.
Abdominal Aortic Aneurysm (AAA)
Bowel obstruction
Contraindications
Open Wounds or Surgical Incisions: Evaluating open wounds, surgical procedures, or large skin inflammation such as abscesses or cellulitis with ultrasonography may bring in infection or harm the recovering tissue.
Severe Abdominal Distension or Ascites: Any form of fullness in the abdomen whether through fluid build-up or gas production may hinder acquisition of images thus leading to low accuracy of diagnosis. It is not exactly a contraindication, but it may reduce the image quality that is produced.
Pain and Discomfort: If the patient develops localized tenderness in the abdomen that becomes difficult to continue further with completing the examination, because the tender areas may cause more discomfort while applying pressure of the ultrasound probe on the tenderness of patient.
Gas or Air in the Abdomen (Bowel Obstruction, Pneumoperitoneum): The air within the bowel presents an obstruction to sound wave transmission, therefore detracting from the quality of images that might be obtained. Several conditions including bowel obstruction, and pneumoperitoneum wherein there exists free air under the diaphragm may delay the scanning process.
Morbid Obesity: Obesity is not a contraindication but may impact the efficiency of ultrasonic wave transmission that may hinder the visualization of the images, because of attenuation by excess adipose tissue.
Outcomes
From this case, it is understood that acutely painful conditions more often involve the abdomen and its ability to quickly diagnose and evaluate these conditions. This can result into early diagnosis of the correct treatment and helpful the desired outcome of the patients.
It will assist in recognizing multiple pathological conditions involving organs in the abdomen among them being gallstones, kidney stones, liver complications, masses, and extravasations.
In the trauma cases bedside ultrasonography including the Focused Assessment with Sonography for Trauma exam that allows to detect free fluid in abdomen and thus provides information on internal haemorrhaging.
Abdominal ultrasonography has applications for guiding several interventional procedures such as paracentesis, abscess drainage, or central line insertion. It is stated that this guidance can improve efficiency, reliability, and security of those operations.
They can be used to take the follow up of the patients, tract their changes in the fluid status, evaluate the response to the procedure and detect any complications.
Periprocedural evaluation
Equipment Required
Ultrasound machine
Transducer
Gel
Imaging control
Display monitor
Patient drape
Patient Preparation:
Fasting: The patient must not consume any meals and refrain to eat 6 to 8 hours to reduce the distension to small bowel with gas before the exam. This may impair imaging particularly for liver and gallbladder sonography.
Bladder Fullness: A full bladder is preferable to provide a better acoustic window for pelvic ultrasound of uterus and bladder.
Expose Abdomen: For ultrasound examination of the patient’s abdomen, the area of interest should extend from the lower part of the ribs to the pelvis area, this will ensure that probe can easily access the required region.
Relaxation: The patient should minimize the tension of abdominal muscles to improve the sonographic window.
Patient Positioning:
Comfortable Positioning: The patient should lie in the supine position and other positions, which may include left lateral decubitus and used depending on the organs of interest.
The following items are the equipment required for abdominal bedside ultrasonography:
A color-flowing ultrasound machine in both power and doppler
Curvilinear transducer with low frequency (2-5 MHz)
Gel for acoustic coupling
The gloves
The right materials to cover patients
The supine position is generally recommended posture for patient evaluation, individuals may be transferred to the lateral decubitus position, because it helps to better visualize specific structures (like gallbladder).
Male patients should be examined with their full abdomen. When treating female patients, exercise the caution to reduce the exposure of sensitive parts.
Overall thoughts
A few scanning pattern which needs a quick discussion in the bedside ultrasonography. The ultrasonic probe marks 1 of 2 orientations mainly by the convention. The head of patient or their right side must be in the path of the probe indicator. The dot on the screen represents as an ultrasound probe indicator and it needs to be in the position on the screen right to get the image consistently. The uniformity of the image which is displayed in the ultrasound screen is facilitated by these conventions. However, various specialties have different norms, when it comes to place the probe marker and the dot screen.
FAST examination:
Equipment Needed:
Ultrasound device features power and color flow doppler functions.
Use a tiny, curved array or phased array probe (1.0 to 4.0 MHz) or a low-frequency (2 to 5 MHz) curvilinear transducer for a sufficient tissue penetration.
To remove air from space between patient’s skin and probe, use acoustic coupling gel.
Gloves are used to prevent the infections.
Proper drapery materials are used for the protection of patient confidentiality.
Patient Preparation
Step 1-Position of the Patient:
Place the patient in a supine position to allow the free fluid and accumulate in the dependent areas.
Optional: Use Trendelenburg position (head down tilt) to increase the sensitivity for detecting free fluid in the upper quadrants.
Ensure the patient is comfortable, specifically when they have abdominal tenderness.
Step 2-Expose the Abdomen:
For male patient, expose the entire abdomen.
For female patient, expose only the necessary areas to maintain modesty.
Step 3-Apply Coupling Gel:
Apply a generous amount of acoustic coupling gel to the probe or direct on skin where probe will be placed.
Probe Orientation and Conventions:
Probe Marker Orientation:
Longitudinal (Sagittal) Views: Point probe marker towards the patient’s head.
Transverse Views: Point probe marker towards the patient right side.
Screen Orientation:
Ensure the indicator dot on ultrasound screen corresponds to the probe marker and is displayed on the right side of the screen.
Performing the FAST Examination
The FAST exam includes four standard views to assess for free fluid:
1-Right Upper Quadrant (RUQ) View:
Probe Placement:
Place the probe in mid-axillary line between 8th and 11th ribs.
Orient the probe longitudinally with the marker toward the patient’s head.
Technique:
Use a subcostal approach if ribs obstruct the view.
Angle the probe slightly posteriorly to visualize the interface between the liver and right kidney (Morison’s pouch).
Look for anechoic (black) areas indicating free fluid in Morison’s pouch.
Scan through the area by moving probe anteriorly and posteriorly.
Evaluate the diaphragm for pleural fluid above the liver.
Left Upper Quadrant (LUQ) View
Probe Placement:
Place the probe in posterior axillary line between 6th and 9th ribs.
Orient the probe longitudinally with the marker towards the patient’s head.
Technique:
Angle the probe slightly posteriorly and superiorly.
Check the interface between spleen and left kidney (splenorenal recess).
Assessment:
Look for anechoic areas indicating free fluid around the spleen or splenorenal recess.
Assess the subdiaphragmatic space for accumulation the fluid.
Subxiphoid (Pericardial) View
Probe Placement:
Place the probe just below the xiphoid process and angled upward towards the left shoulder.
Orient the probe transversely with the marker towards the patient’s right side.
Technique:
Apply firm and gentle pressure to the displace bowel gas.
Adjust the angle to obtain a clear four-chamber view of heart.
Identify the pericardium and look for anechoic fluid indicating a pericardial effusion.
If the subxiphoid view is inadequate, then switch to parasternal long-axis view:
Place the probe at the left sternal border in 3rd or 4th intercostal space.
Orient the probe with the marker towards the patient’s right shoulder.
Suprapubic (Pelvic) View
Probe Placement:
Place the probe just above the pubic symphysis.
Obtain both longitudinal (sagittal) and transverse views.
Technique:
For the sagittal view, orient the probe marker towards the patient’s head.
For the transverse view, orient the probe marker towards the patient’s right side.
Make sure that the bladder is full for the better visualization.
Assessment:
Look for free fluid in the rectovesical pouch (in males) or pouch of Douglas (in females).
Note that small amounts of free fluid can be normal in women of childbearing age.
Interpretation of Findings:
Positive FAST Exam:
Presence of anechoic (black) free fluid in any of the four views suggests possible internal bleeding.
In trauma patients, free fluid is presumed to be blood until proven otherwise.
Negative FAST Exam:
Absence of free fluid in all four views.
Note that a negative exam does not entirely rule out the intra-abdominal injury.
Patient Positioning Adjustments:
If initial views are inadequate, consider:
Tilting the patient (Trendelenburg or reverse Trendelenburg) to redistribute fluid.
Reposition the probe slightly to obtain better images.
Asking the patient to take a deep breath to move organs into view.
Limitations of the FAST Examination:
Detection Limitations:
May not detect small volumes of free fluid, especially in the early stages of bleeding.
Limited ability to assess the injuries to bowel, diaphragm, or retroperitoneal structures.
Not reliable for identifying the bleeding from pelvic fractures.
Patient Factors:
Obesity or large body habitus can impede image quality.
Presence of subcutaneous emphysema or surgical dressings may obstruct views.
Technical Factors:
Operator skill and experience can affect the accuracy of examination.
Bowel gas can interfere with the image acquisition.
Documentation and Communication:
Record Images:
Save representative images or clips from each of the four views.
Report Findings:
Document the presence or absence of free fluid in each area.
Note any limitations or difficulties encountered during the exam.
Clinical Correlation:
Communicate the findings promptly to trauma team or attending physician.
Use the results to guide further management (e.g., surgical consultation, additional imaging).
Post-Examination Care:
Clean Equipment:
Wipe down probe and machine according to the infection control protocols.
Reposition the Patient:
Make sure that the patient is comfortable and covered properly after the exam.
Follow-Up:
Monitor the patient for any changes in condition. If any clinical indication appears, repeat the FAST exam.
Summary of Clinical Questions Addressed:
Is there any free intraperitoneal fluid present?
It is assessed by evaluating the Morison’s pouch, splenorenal recess, and pelvis.
Is there a pericardial effusion present?
It is assessed by the subxiphoid or parasternal view of the heart.
Key Points to Remember:
The FAST exam is a rapid exam for patients who have trauma and for assessment of bedside ultrasound.
It is focused on detecting the free fluid that may indicate internal bleeding.
To understand the limitations is important. Absence of free fluid does not exclude any injury occurred.
Proper technique and patient positioning enhance the sensitivity of the exam.
Immediate interpretation and communication of findings are essential for the patient care.
By following the above steps, healthcare providers can effectively perform the FAST examination to assist in the rapid assessment and management of the patients with potential internal injuries because of the trauma.
1-Abdominal aortic aneurysm
Vascular ultrasound of abdominal aorta
Clinical questions:
Is there evidence of AAA rupture or impending rupture?
Ultrasound Findings: While ultrasound is not highly sensitive to detect rupture, the following signs may suggest an impending rupture:
Presence of a Hematoma: A retroperitoneal hematoma can indicate a rupture, which may not be visualized clearly on the ultrasound. Look for abnormalities adjacent to the aorta.
Changes in Aortic Shape: A sudden change in the shape of aneurysm, particularly development of an irregular contour, or a saccular appearance can indicate the rupture or impending rupture.
Evidence of Free Fluid: While ultrasound is not typically used to evaluate the intraperitoneal bleeding, but any evidence of free fluid adjacent to the aorta may warrant for further investigation.
Clinical Correlation: Always correlate imaging findings with the clinical signs and symptoms including:
Acute Onset of Severe Abdominal or Back Pain: This symptom may indicate a rupture.
Hypotension or Signs of Shock: Hemodynamic instability is critical, any patient presenting with these symptoms should be treated as a potential rupture.
Is there any evidence of AAA enlargement on recent imaging?
Assess the size of AAA:
Previous Imaging Comparison: Use the previous ultrasound or CT scan image studies to evaluate any change in the size of the AAA. Measurements must be taken form the outer wall to outer wall and from both the transverse and longitudinal views must be analyzed.
Monitor the Growth:
AAA Growth Criteria: An elevated size of > 0.5 cm over 6 months, or > 1.0 cm per year is significant and must need immediate evaluation and management.
Longitudinal Assessment: Regular monitoring by the ultrasound can be helpful to tract the AAA size, specifically in patients who have known AAA and have not any indications for immediate surgery.
Documentation of Measurements:
Record precise measurements of the AAA in both transverse and longitudinal planes. Ensure that the measurements include entire aneurysm which accounts for any associated thrombus or clot.
Patient Preparation:
Position patient supine with arms at their sides to allow full access to the abdomen.
Apply sufficient ultrasound gel to minimize air between the probe and the skin.
AAA Overview: Symptomatic AAA, particularly with a hemodynamic instability is a medical emergency that requires prompt intervention. While physical examination may miss an AAA, but bedside ultrasound has a high sensitivity (94% to 100%) in detecting an aneurysm.
Urgency in Diagnosis: Ultrasound cannot reliably detect aneurysm rupture. However, the presence of AAA in a hemodynamically compromised patient needs immediate surgical consultation.
Probe Selection and Equipment:
Recommended Probe: A 2.0 to 5.0 MHz curvilinear abdominal probe is used in most of the patients who gives a proper tissue penetration.
Lower the frequency of the probe to improve the penetration in patients who have large body habitus. Use a large footprint probe to displace the bowel gas to ensure the clearer image.
Step-by-Step Examination Technique:
Transverse Views:
Coverage Area: Visualize the abdominal aorta from the xiphoid process to the iliac bifurcation. Start scanning from just below the sternum down to umbilicus.
Measurement: In the transverse plane, when measured from the outer wall to the outer wall in the anterior-posterior direction. An aorta larger than 3.0 cm is typically classified as aneurysm.
Iliac Artery Examination: Evaluate the common iliac arteries for aneurysms with diameter >1.5 cm after scanning the aorta.
Longitudinal Views:
Maximizing Accuracy: Ensure the widest diameter of aorta is captured, and avoid false negatives by scanning laterally through the vessel.
Rare Forms: Saccular aneurysms are although rare, but best seen in the longitudinal views.
Imaging Tips for AAA:
Patient Positioning:
If bowel gas obstructs the view, position patient in left lateral decubitus.
Ask the patient to take a deep breath, allowing liver to descend, and improve aortic visualization.
Displacing Bowel Gas:
Use a steady pressure with a large footprint probe and if necessary, apply an additional hand pressure to displace the bowel gas to get the better image.
Coronal Plane Scanning:
Utilize the liver or spleen as sonographic windows when scanning from a midaxillary view.
Identifying Key Structures and Avoiding Pitfalls:
Vertebra as a Landmark: Identify vertebrae by their hyperechoic appearance with the posterior shadowing and locate aorta just anterior and left of vertebrae.
IVC vs. Aorta:
Use a sniff test to collapse the IVC (but not the aorta) and color Doppler to differentiate flow (pulsatile in aorta, continuous in IVC).
In the transverse plane, aortic flow will appear red when blood flows toward probe (feet toward head).
Limitations of Ultrasonography for AAA:
Rupture Detection: Ultrasonography is not sensitive for detecting aneurysmal rupture, as bleeding is often retroperitoneal, and not easily visible.
Patient-Related Challenges: Visualization may be limited by bowel gas or obesity, necessitating the alternative imaging approaches if necessary.
Summary and Take-Home Points:
Immediate Action: In the presence of a AAA in a hemodynamically unstable patient, emergent operative evaluation should not be delayed.
Ultrasound Accuracy: While highly sensitive for AAA detection, ultrasound has limitations in detecting the rupture.
Imaging Protocol: Make sure that the both transverse and longitudinal views are properly and thoroughly performed with the measurements which us taken from the outer wall to outer wall to avoid any underestimations.
2-Inferior vena cava
Clinical questions:
How does IVC diameter change in the patients with heart failure or fluid overload?
What are normal ranges for IVC diameter variation in the healthy individuals?
Ultrasound Approach:
Probe Position: Use the low-frequency abdominal or curvilinear probe.
Scan Location: The IVC is usually demonstrated in subxiphoid view or right upper quadrant view.
Identification: Locate the IVC as it passes behind the liver and joins the right atrium of the heart. It appears as a large, anechoic structure.
IVC Diameter:
Normal range: Usually, the IVC measures at least 1. 5 to 2. 5 cm.
Dilated IVC: A diameter more than 2.5 cm may be abnormal because, it may indicate fluid overload and elevated central venous pressure (CVP) associated with conditions like heart failure o pulmonary hypertension.
Collapsed IVC: Having an IVC diameter of less than 1. 5 cm can mean low pulse volume or low CVP, which implies that the patient is dehydrated or in shock.
IVC Collapsibility Index (IVC-CI):
This index evaluates the change in IVC diameter during respiratory cycle, usually measuring the percentage change from maximal inspiration to expiration.
High collapsibility (>50%): Indicates hypovolemia or low intravascular volume, where the IVC collapses significantly during inspiration (especially in spontaneously breathing patients).
Low collapsibility (<20%): Suggests high filling pressures or volume overload, where the IVC does not collapse as much during respiration.
IVC Variation with Respiration:
The IVC naturally changes in diameter during the respiratory cycle:
Inspiration (spontaneously breathing): IVC collapses due to the negative intrathoracic pressure.
Expiration: The IVC dilates.
These variations help assess the patient’s intravascular volume status and right heart pressures.
IVC Longitudinal View:
In addition to transverse measurements, the longitudinal view helps in assessing the continuity and appearance of IVC, including any abnormality like clots or narrowing.
Limitations of ultrasonography in IVC evaluation
Image Quality: Poor image quality due to factors such as obesity, excessive gas in the gastrointestinal tract, or patient movement can hinder accurate measurement of IVC.
Anatomical Variability: Numerous factors exist which have impact on size and course of IVC, these variations hamper the normal standardization of measurements or its consistencies.
Limited View: The IVC cannot be well always seen, and this may be due to the anatomical condition of patient. Some positions or conditions may obscure the IVC or make measurements very challenging.
3-Biliary tract
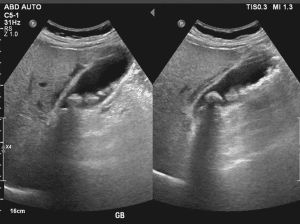
Evidence of gallstone in the gallbladder
Clinical questions:
Are there any gallbladder polyps or masses present?
Is there evidence of bile duct obstruction?
Are there any signs of pancreatitis?
Approach to Biliary Tract Ultrasound:
Fasting: The patient should ideally fast for 6-8 hours prior to the examination to reduce the content in stomach to have a better view of gallbladder and its biliary structures.
Patient Positioning:
Supine Position: The patient should be on supine position with the lower part of the abdomen exposed. Occasionally, having the patient in a left lateral decubitus position may help in viewing some areas much better.
Transducer Selection:
Frequency: While scanning the abdominal area, it is advisably to use transducer of low to intermediate frequency band (2-5 MHz) to improve penetration through the different abdominal structures.
Elements of Examination:
Gallbladder:
Size and Shape: Make sure the size, shape and wall thickness are normal. Ensure that a gallbladder is normally pear shaped.
Wall Thickness: Check the wall thickness; if increased one may suspect inflammation (eg cholecystitis).
Contents: Attempt to find the presence of stones, sludge and other pathological characteristics.
Sonographic Murphy’s Sign: Press with the transducer on the abdomen to determine whether there is tenderness in the gall bladder area to indicate cholecystitis.
Common Bile Duct (CBD):
Measurement: Diameter of CBD must be measured. Normal diameter ranges from <6mm-8 mm, but it may show variation with age.
Patency: Look for renal calculus or kidney stones or any other obstruction. CBD must be dilated as obstruction or cholestasis is suggested by this condition.
Intrahepatic Bile Ducts:
Dilatation: Look out for calcifications, a sign of gallstones that cause obstructive jaundice or cholangitis.
Wall Characteristics: To find the thickening or the irregularity of the line.
Hepatic Parenchyma:
Visualization: Make sure that you can clearly examine liver parenchyma because this can give hints to the biliary tract pathology such as hepatocellular disease or metastases that can influence biliary tree.
Additional Structures:
Pancreas: Occasionally there is investigation of the pancreatic head and its relationship to the bile ducts in certain diseases such as pancreatic cancer, that may obstruct the bile ducts.
Portal Vein: Evaluate the patency of portal vein and such signs of portal hypertension which can have impact on biliary system indirectly.
Limitations of bedside biliary ultrasonography
Artifacts: Various artefacts for instance shadowing, reverberation or poor acoustic windows compromise on image quality making it difficult to perform an assessment. This is difficult especially in the obese patients or those who have more bowel gases.
Complex Pathologies: There are conditions that may not be visualized well by bedside ultrasonography, for example, small stones, slight alterations in the bile duct or early-stage diseases. In patients with complicated biliary tract pathology, further imaging as EUS or MRCP might be used for diagnosis.
4-Appendicitis
Clinical questions:
Is there evidence of increased blood flow to the appendix?
Is there wall thickening of the appendix?
Is the appendix in an atypical location?
Probe Selection
High-Frequency Linear Probe:
Purpose: Provides the better resolution for superficial structures, including appendix.
Frequency: 7.5 to 10 MHz.
Usage: To evaluate the appendix because of the high resolution and ability to see the small details.
Elements of Examination
Patient Positioning:
Supine Position: The patient lies on their back to allow the optimal access to the abdomen.
Left Lateral Decubitus Position: This can be useful to the displace bowel gas and for the better visualize of the appendix.
Technique:
Start in the Right Lower Quadrant (RLQ):
The appendix is commonly located in the right lower quadrant.
Apply Gel: Ensure a best acoustic window and avoid the artifacts.
Use Graded Compression: Light pressure with the probe can displace the bowel gas and improve the image of the appendix.
Visualizing the Appendix:
Longitudinal View: It is used to identify the appendix in the longitudinal plane. The normal appendix appears as a blind-ending tubular structure.
Transverse View: Helps confirm the diagnosis and assess the diameter of the appendix.
Assess for Signs of Appendicitis:
Wall Thickening: An inflamed appendix often shows a thickened wall (>2 mm).
Increased Echogenicity: Surrounding fat may appear hyperechoic.
Peri-appendiceal Fluid: Look for any free fluid or abscess formation.
Non-compressibility: The inflamed appendix does not compress with the gentle pressure.
Additional Considerations:
Assess Nearby Structures: Assess the nearby structures to exclude any potential causes of RLQ pain like ectopic pregnancy or ovarian cysts in women or any other GI issues.
Compare with the Contralateral Side: At times, it becomes useful to compare it with what is expected on the left side of the anatomy to determine the extent of abnormality.
Limitation of the examination
Artifact Interference: Gas in the bowel can create artifacts that obscure the view of the appendix and make visualization difficult.
Difficulty Visualizing: In obese patients, it may become difficult to obtain adequate visualization of appendix.
5-Paracentesis

Evidence of Ascites accumulation through ultrasonography
Probe Selection
Low-Frequency Curved Array Probe:
Use: Ideal for abdominal imaging.
Frequency Range: 2-5 MHz.
Advantages: Provides good depth penetration, essential for visualizing deeper structures and fluid collections.
Elements of examination:
Static Approach:
Technique: The static approach is done using ultrasound where the anticipated region of needle placement is detected and marked before the procedure is done. Abdomen is physically examined with a view of identifying some of the accumulations of fluids, a right location to access the fluid is then identified.
Advantages: This method allows to careful plan and ensures that the needle is inserted in most appropriate area, reducing the risk of complications.
They help the physician to determine exact depth of the target fluid and thereby increases the chances of penetrating correct target and not the surrounding tissues.
Dynamic Approach:
Technique: The dynamic approach implies the ultrasound imaging during the paracentesis process when it is being performed. The ultrasound probe remains in contact with the patient’s skin while the needle is inserted; this way the operator gets real time view of the needle path and its neighbouring fluid.
Advantages: This approach leads to constant feedback, thus great flexibility in changing the position of the needle if required. It can help avoid injury to nearby organs and vessels and can improve the accuracy of fluid aspiration.
Some discomfort or pain may be encountered by patient during the procedure, especially if pressure is applied on the ultrasound transducer or the there is a painful pathology.
In some conditions like abdominal wall hernias or unstable fracture, the examination might possibly cause a deterioration in such conditions.
Interpretive errors of ultrasound images can result to either false-positive or false-negative implying on patient management. This risk is reduced when the training provided to the practitioners is sufficient, as well as some of the measures taken regarding quality assurance.
Bedside ultrasonography is also further limited that is the ’real-time’ imaging technique and imaging field confined to the size of the probe used hence limited in comparison to comprehensive scanning imaging series like a CT or MRI.


Ultrasonography at the bedside, particularly abdominal ultrasonography is another medical imaging technique that has received much consideration in recent years.
Portable ultrasound scanners are employed to do fast and targeted examinations of the organs while the patient is on bed.
Bedside ultrasonography gives real-time images and improves clinical decision-making as it takes time to image, assess, and come up with a decision at the patient’s bedside.
Transportable ultrasound machines are smaller that enables them to be taken from one location to another used in situations within or outside the healthcare facility.
Ascites Detection
Cholelithiasis
Gallstones
Acute or chronic cholecystitis
Bile duct obstruction.
Stones in the kidneys and bladders
Suspected urinary blockage.
Abdominal Aortic Aneurysm (AAA)
Bowel obstruction
Open Wounds or Surgical Incisions: Evaluating open wounds, surgical procedures, or large skin inflammation such as abscesses or cellulitis with ultrasonography may bring in infection or harm the recovering tissue.
Severe Abdominal Distension or Ascites: Any form of fullness in the abdomen whether through fluid build-up or gas production may hinder acquisition of images thus leading to low accuracy of diagnosis. It is not exactly a contraindication, but it may reduce the image quality that is produced.
Pain and Discomfort: If the patient develops localized tenderness in the abdomen that becomes difficult to continue further with completing the examination, because the tender areas may cause more discomfort while applying pressure of the ultrasound probe on the tenderness of patient.
Gas or Air in the Abdomen (Bowel Obstruction, Pneumoperitoneum): The air within the bowel presents an obstruction to sound wave transmission, therefore detracting from the quality of images that might be obtained. Several conditions including bowel obstruction, and pneumoperitoneum wherein there exists free air under the diaphragm may delay the scanning process.
Morbid Obesity: Obesity is not a contraindication but may impact the efficiency of ultrasonic wave transmission that may hinder the visualization of the images, because of attenuation by excess adipose tissue.
From this case, it is understood that acutely painful conditions more often involve the abdomen and its ability to quickly diagnose and evaluate these conditions. This can result into early diagnosis of the correct treatment and helpful the desired outcome of the patients.
It will assist in recognizing multiple pathological conditions involving organs in the abdomen among them being gallstones, kidney stones, liver complications, masses, and extravasations.
In the trauma cases bedside ultrasonography including the Focused Assessment with Sonography for Trauma exam that allows to detect free fluid in abdomen and thus provides information on internal haemorrhaging.
Abdominal ultrasonography has applications for guiding several interventional procedures such as paracentesis, abscess drainage, or central line insertion. It is stated that this guidance can improve efficiency, reliability, and security of those operations.
They can be used to take the follow up of the patients, tract their changes in the fluid status, evaluate the response to the procedure and detect any complications.
Equipment Required
Ultrasound machine
Transducer
Gel
Imaging control
Display monitor
Patient drape
Patient Preparation:
Fasting: The patient must not consume any meals and refrain to eat 6 to 8 hours to reduce the distension to small bowel with gas before the exam. This may impair imaging particularly for liver and gallbladder sonography.
Bladder Fullness: A full bladder is preferable to provide a better acoustic window for pelvic ultrasound of uterus and bladder.
Expose Abdomen: For ultrasound examination of the patient’s abdomen, the area of interest should extend from the lower part of the ribs to the pelvis area, this will ensure that probe can easily access the required region.
Relaxation: The patient should minimize the tension of abdominal muscles to improve the sonographic window.
Patient Positioning:
Comfortable Positioning: The patient should lie in the supine position and other positions, which may include left lateral decubitus and used depending on the organs of interest.
The following items are the equipment required for abdominal bedside ultrasonography:
A color-flowing ultrasound machine in both power and doppler
Curvilinear transducer with low frequency (2-5 MHz)
Gel for acoustic coupling
The gloves
The right materials to cover patients
The supine position is generally recommended posture for patient evaluation, individuals may be transferred to the lateral decubitus position, because it helps to better visualize specific structures (like gallbladder).
Male patients should be examined with their full abdomen. When treating female patients, exercise the caution to reduce the exposure of sensitive parts.
Overall thoughts
A few scanning pattern which needs a quick discussion in the bedside ultrasonography. The ultrasonic probe marks 1 of 2 orientations mainly by the convention. The head of patient or their right side must be in the path of the probe indicator. The dot on the screen represents as an ultrasound probe indicator and it needs to be in the position on the screen right to get the image consistently. The uniformity of the image which is displayed in the ultrasound screen is facilitated by these conventions. However, various specialties have different norms, when it comes to place the probe marker and the dot screen.
FAST examination:
Equipment Needed:
Ultrasound device features power and color flow doppler functions.
Use a tiny, curved array or phased array probe (1.0 to 4.0 MHz) or a low-frequency (2 to 5 MHz) curvilinear transducer for a sufficient tissue penetration.
To remove air from space between patient’s skin and probe, use acoustic coupling gel.
Gloves are used to prevent the infections.
Proper drapery materials are used for the protection of patient confidentiality.
Step 1-Position of the Patient:
Place the patient in a supine position to allow the free fluid and accumulate in the dependent areas.
Optional: Use Trendelenburg position (head down tilt) to increase the sensitivity for detecting free fluid in the upper quadrants.
Ensure the patient is comfortable, specifically when they have abdominal tenderness.
Step 2-Expose the Abdomen:
For male patient, expose the entire abdomen.
For female patient, expose only the necessary areas to maintain modesty.
Step 3-Apply Coupling Gel:
Apply a generous amount of acoustic coupling gel to the probe or direct on skin where probe will be placed.
Probe Orientation and Conventions:
Probe Marker Orientation:
Longitudinal (Sagittal) Views: Point probe marker towards the patient’s head.
Transverse Views: Point probe marker towards the patient right side.
Screen Orientation:
Ensure the indicator dot on ultrasound screen corresponds to the probe marker and is displayed on the right side of the screen.
The FAST exam includes four standard views to assess for free fluid:
1-Right Upper Quadrant (RUQ) View:
Probe Placement:
Place the probe in mid-axillary line between 8th and 11th ribs.
Orient the probe longitudinally with the marker toward the patient’s head.
Technique:
Use a subcostal approach if ribs obstruct the view.
Angle the probe slightly posteriorly to visualize the interface between the liver and right kidney (Morison’s pouch).
Look for anechoic (black) areas indicating free fluid in Morison’s pouch.
Scan through the area by moving probe anteriorly and posteriorly.
Evaluate the diaphragm for pleural fluid above the liver.
Probe Placement:
Place the probe in posterior axillary line between 6th and 9th ribs.
Orient the probe longitudinally with the marker towards the patient’s head.
Technique:
Angle the probe slightly posteriorly and superiorly.
Check the interface between spleen and left kidney (splenorenal recess).
Assessment:
Look for anechoic areas indicating free fluid around the spleen or splenorenal recess.
Assess the subdiaphragmatic space for accumulation the fluid.
Probe Placement:
Place the probe just below the xiphoid process and angled upward towards the left shoulder.
Orient the probe transversely with the marker towards the patient’s right side.
Technique:
Apply firm and gentle pressure to the displace bowel gas.
Adjust the angle to obtain a clear four-chamber view of heart.
Identify the pericardium and look for anechoic fluid indicating a pericardial effusion.
If the subxiphoid view is inadequate, then switch to parasternal long-axis view:
Place the probe at the left sternal border in 3rd or 4th intercostal space.
Orient the probe with the marker towards the patient’s right shoulder.
Probe Placement:
Place the probe just above the pubic symphysis.
Obtain both longitudinal (sagittal) and transverse views.
Technique:
For the sagittal view, orient the probe marker towards the patient’s head.
For the transverse view, orient the probe marker towards the patient’s right side.
Make sure that the bladder is full for the better visualization.
Assessment:
Look for free fluid in the rectovesical pouch (in males) or pouch of Douglas (in females).
Note that small amounts of free fluid can be normal in women of childbearing age.
Interpretation of Findings:
Positive FAST Exam:
Presence of anechoic (black) free fluid in any of the four views suggests possible internal bleeding.
In trauma patients, free fluid is presumed to be blood until proven otherwise.
Negative FAST Exam:
Absence of free fluid in all four views.
Note that a negative exam does not entirely rule out the intra-abdominal injury.
Patient Positioning Adjustments:
If initial views are inadequate, consider:
Tilting the patient (Trendelenburg or reverse Trendelenburg) to redistribute fluid.
Reposition the probe slightly to obtain better images.
Asking the patient to take a deep breath to move organs into view.
Limitations of the FAST Examination:
Detection Limitations:
May not detect small volumes of free fluid, especially in the early stages of bleeding.
Limited ability to assess the injuries to bowel, diaphragm, or retroperitoneal structures.
Not reliable for identifying the bleeding from pelvic fractures.
Patient Factors:
Obesity or large body habitus can impede image quality.
Presence of subcutaneous emphysema or surgical dressings may obstruct views.
Technical Factors:
Operator skill and experience can affect the accuracy of examination.
Bowel gas can interfere with the image acquisition.
Documentation and Communication:
Record Images:
Save representative images or clips from each of the four views.
Report Findings:
Document the presence or absence of free fluid in each area.
Note any limitations or difficulties encountered during the exam.
Clinical Correlation:
Communicate the findings promptly to trauma team or attending physician.
Use the results to guide further management (e.g., surgical consultation, additional imaging).
Post-Examination Care:
Clean Equipment:
Wipe down probe and machine according to the infection control protocols.
Reposition the Patient:
Make sure that the patient is comfortable and covered properly after the exam.
Follow-Up:
Monitor the patient for any changes in condition. If any clinical indication appears, repeat the FAST exam.
Summary of Clinical Questions Addressed:
Is there any free intraperitoneal fluid present?
It is assessed by evaluating the Morison’s pouch, splenorenal recess, and pelvis.
Is there a pericardial effusion present?
It is assessed by the subxiphoid or parasternal view of the heart.
Key Points to Remember:
The FAST exam is a rapid exam for patients who have trauma and for assessment of bedside ultrasound.
It is focused on detecting the free fluid that may indicate internal bleeding.
To understand the limitations is important. Absence of free fluid does not exclude any injury occurred.
Proper technique and patient positioning enhance the sensitivity of the exam.
Immediate interpretation and communication of findings are essential for the patient care.
By following the above steps, healthcare providers can effectively perform the FAST examination to assist in the rapid assessment and management of the patients with potential internal injuries because of the trauma.
1-Abdominal aortic aneurysm
Vascular ultrasound of abdominal aorta
Clinical questions:
Is there evidence of AAA rupture or impending rupture?
Ultrasound Findings: While ultrasound is not highly sensitive to detect rupture, the following signs may suggest an impending rupture:
Presence of a Hematoma: A retroperitoneal hematoma can indicate a rupture, which may not be visualized clearly on the ultrasound. Look for abnormalities adjacent to the aorta.
Changes in Aortic Shape: A sudden change in the shape of aneurysm, particularly development of an irregular contour, or a saccular appearance can indicate the rupture or impending rupture.
Evidence of Free Fluid: While ultrasound is not typically used to evaluate the intraperitoneal bleeding, but any evidence of free fluid adjacent to the aorta may warrant for further investigation.
Clinical Correlation: Always correlate imaging findings with the clinical signs and symptoms including:
Acute Onset of Severe Abdominal or Back Pain: This symptom may indicate a rupture.
Hypotension or Signs of Shock: Hemodynamic instability is critical, any patient presenting with these symptoms should be treated as a potential rupture.
Is there any evidence of AAA enlargement on recent imaging?
Assess the size of AAA:
Previous Imaging Comparison: Use the previous ultrasound or CT scan image studies to evaluate any change in the size of the AAA. Measurements must be taken form the outer wall to outer wall and from both the transverse and longitudinal views must be analyzed.
Monitor the Growth:
AAA Growth Criteria: An elevated size of > 0.5 cm over 6 months, or > 1.0 cm per year is significant and must need immediate evaluation and management.
Longitudinal Assessment: Regular monitoring by the ultrasound can be helpful to tract the AAA size, specifically in patients who have known AAA and have not any indications for immediate surgery.
Documentation of Measurements:
Record precise measurements of the AAA in both transverse and longitudinal planes. Ensure that the measurements include entire aneurysm which accounts for any associated thrombus or clot.
Patient Preparation:
Position patient supine with arms at their sides to allow full access to the abdomen.
Apply sufficient ultrasound gel to minimize air between the probe and the skin.
AAA Overview: Symptomatic AAA, particularly with a hemodynamic instability is a medical emergency that requires prompt intervention. While physical examination may miss an AAA, but bedside ultrasound has a high sensitivity (94% to 100%) in detecting an aneurysm.
Urgency in Diagnosis: Ultrasound cannot reliably detect aneurysm rupture. However, the presence of AAA in a hemodynamically compromised patient needs immediate surgical consultation.
Probe Selection and Equipment:
Recommended Probe: A 2.0 to 5.0 MHz curvilinear abdominal probe is used in most of the patients who gives a proper tissue penetration.
Lower the frequency of the probe to improve the penetration in patients who have large body habitus. Use a large footprint probe to displace the bowel gas to ensure the clearer image.
Step-by-Step Examination Technique:
Transverse Views:
Coverage Area: Visualize the abdominal aorta from the xiphoid process to the iliac bifurcation. Start scanning from just below the sternum down to umbilicus.
Measurement: In the transverse plane, when measured from the outer wall to the outer wall in the anterior-posterior direction. An aorta larger than 3.0 cm is typically classified as aneurysm.
Iliac Artery Examination: Evaluate the common iliac arteries for aneurysms with diameter >1.5 cm after scanning the aorta.
Longitudinal Views:
Maximizing Accuracy: Ensure the widest diameter of aorta is captured, and avoid false negatives by scanning laterally through the vessel.
Rare Forms: Saccular aneurysms are although rare, but best seen in the longitudinal views.
Imaging Tips for AAA:
Patient Positioning:
If bowel gas obstructs the view, position patient in left lateral decubitus.
Ask the patient to take a deep breath, allowing liver to descend, and improve aortic visualization.
Displacing Bowel Gas:
Use a steady pressure with a large footprint probe and if necessary, apply an additional hand pressure to displace the bowel gas to get the better image.
Coronal Plane Scanning:
Utilize the liver or spleen as sonographic windows when scanning from a midaxillary view.
Identifying Key Structures and Avoiding Pitfalls:
Vertebra as a Landmark: Identify vertebrae by their hyperechoic appearance with the posterior shadowing and locate aorta just anterior and left of vertebrae.
IVC vs. Aorta:
Use a sniff test to collapse the IVC (but not the aorta) and color Doppler to differentiate flow (pulsatile in aorta, continuous in IVC).
In the transverse plane, aortic flow will appear red when blood flows toward probe (feet toward head).
Limitations of Ultrasonography for AAA:
Rupture Detection: Ultrasonography is not sensitive for detecting aneurysmal rupture, as bleeding is often retroperitoneal, and not easily visible.
Patient-Related Challenges: Visualization may be limited by bowel gas or obesity, necessitating the alternative imaging approaches if necessary.
Summary and Take-Home Points:
Immediate Action: In the presence of a AAA in a hemodynamically unstable patient, emergent operative evaluation should not be delayed.
Ultrasound Accuracy: While highly sensitive for AAA detection, ultrasound has limitations in detecting the rupture.
Imaging Protocol: Make sure that the both transverse and longitudinal views are properly and thoroughly performed with the measurements which us taken from the outer wall to outer wall to avoid any underestimations.
2-Inferior vena cava
Clinical questions:
How does IVC diameter change in the patients with heart failure or fluid overload?
What are normal ranges for IVC diameter variation in the healthy individuals?
Ultrasound Approach:
Probe Position: Use the low-frequency abdominal or curvilinear probe.
Scan Location: The IVC is usually demonstrated in subxiphoid view or right upper quadrant view.
Identification: Locate the IVC as it passes behind the liver and joins the right atrium of the heart. It appears as a large, anechoic structure.
IVC Diameter:
Normal range: Usually, the IVC measures at least 1. 5 to 2. 5 cm.
Dilated IVC: A diameter more than 2.5 cm may be abnormal because, it may indicate fluid overload and elevated central venous pressure (CVP) associated with conditions like heart failure o pulmonary hypertension.
Collapsed IVC: Having an IVC diameter of less than 1. 5 cm can mean low pulse volume or low CVP, which implies that the patient is dehydrated or in shock.
IVC Collapsibility Index (IVC-CI):
This index evaluates the change in IVC diameter during respiratory cycle, usually measuring the percentage change from maximal inspiration to expiration.
High collapsibility (>50%): Indicates hypovolemia or low intravascular volume, where the IVC collapses significantly during inspiration (especially in spontaneously breathing patients).
Low collapsibility (<20%): Suggests high filling pressures or volume overload, where the IVC does not collapse as much during respiration.
IVC Variation with Respiration:
The IVC naturally changes in diameter during the respiratory cycle:
Inspiration (spontaneously breathing): IVC collapses due to the negative intrathoracic pressure.
Expiration: The IVC dilates.
These variations help assess the patient’s intravascular volume status and right heart pressures.
IVC Longitudinal View:
In addition to transverse measurements, the longitudinal view helps in assessing the continuity and appearance of IVC, including any abnormality like clots or narrowing.
Limitations of ultrasonography in IVC evaluation
Image Quality: Poor image quality due to factors such as obesity, excessive gas in the gastrointestinal tract, or patient movement can hinder accurate measurement of IVC.
Anatomical Variability: Numerous factors exist which have impact on size and course of IVC, these variations hamper the normal standardization of measurements or its consistencies.
Limited View: The IVC cannot be well always seen, and this may be due to the anatomical condition of patient. Some positions or conditions may obscure the IVC or make measurements very challenging.
3-Biliary tract
Evidence of gallstone in the gallbladder
Clinical questions:
Are there any gallbladder polyps or masses present?
Is there evidence of bile duct obstruction?
Are there any signs of pancreatitis?
Approach to Biliary Tract Ultrasound:
Fasting: The patient should ideally fast for 6-8 hours prior to the examination to reduce the content in stomach to have a better view of gallbladder and its biliary structures.
Patient Positioning:
Supine Position: The patient should be on supine position with the lower part of the abdomen exposed. Occasionally, having the patient in a left lateral decubitus position may help in viewing some areas much better.
Transducer Selection:
Frequency: While scanning the abdominal area, it is advisably to use transducer of low to intermediate frequency band (2-5 MHz) to improve penetration through the different abdominal structures.
Elements of Examination:
Gallbladder:
Size and Shape: Make sure the size, shape and wall thickness are normal. Ensure that a gallbladder is normally pear shaped.
Wall Thickness: Check the wall thickness; if increased one may suspect inflammation (eg cholecystitis).
Contents: Attempt to find the presence of stones, sludge and other pathological characteristics.
Sonographic Murphy’s Sign: Press with the transducer on the abdomen to determine whether there is tenderness in the gall bladder area to indicate cholecystitis.
Common Bile Duct (CBD):
Measurement: Diameter of CBD must be measured. Normal diameter ranges from <6mm-8 mm, but it may show variation with age.
Patency: Look for renal calculus or kidney stones or any other obstruction. CBD must be dilated as obstruction or cholestasis is suggested by this condition.
Intrahepatic Bile Ducts:
Dilatation: Look out for calcifications, a sign of gallstones that cause obstructive jaundice or cholangitis.
Wall Characteristics: To find the thickening or the irregularity of the line.
Hepatic Parenchyma:
Visualization: Make sure that you can clearly examine liver parenchyma because this can give hints to the biliary tract pathology such as hepatocellular disease or metastases that can influence biliary tree.
Additional Structures:
Pancreas: Occasionally there is investigation of the pancreatic head and its relationship to the bile ducts in certain diseases such as pancreatic cancer, that may obstruct the bile ducts.
Portal Vein: Evaluate the patency of portal vein and such signs of portal hypertension which can have impact on biliary system indirectly.
Limitations of bedside biliary ultrasonography
Artifacts: Various artefacts for instance shadowing, reverberation or poor acoustic windows compromise on image quality making it difficult to perform an assessment. This is difficult especially in the obese patients or those who have more bowel gases.
Complex Pathologies: There are conditions that may not be visualized well by bedside ultrasonography, for example, small stones, slight alterations in the bile duct or early-stage diseases. In patients with complicated biliary tract pathology, further imaging as EUS or MRCP might be used for diagnosis.
4-Appendicitis
Clinical questions:
Is there evidence of increased blood flow to the appendix?
Is there wall thickening of the appendix?
Is the appendix in an atypical location?
Probe Selection
High-Frequency Linear Probe:
Purpose: Provides the better resolution for superficial structures, including appendix.
Frequency: 7.5 to 10 MHz.
Usage: To evaluate the appendix because of the high resolution and ability to see the small details.
Elements of Examination
Patient Positioning:
Supine Position: The patient lies on their back to allow the optimal access to the abdomen.
Left Lateral Decubitus Position: This can be useful to the displace bowel gas and for the better visualize of the appendix.
Technique:
Start in the Right Lower Quadrant (RLQ):
The appendix is commonly located in the right lower quadrant.
Apply Gel: Ensure a best acoustic window and avoid the artifacts.
Use Graded Compression: Light pressure with the probe can displace the bowel gas and improve the image of the appendix.
Visualizing the Appendix:
Longitudinal View: It is used to identify the appendix in the longitudinal plane. The normal appendix appears as a blind-ending tubular structure.
Transverse View: Helps confirm the diagnosis and assess the diameter of the appendix.
Assess for Signs of Appendicitis:
Wall Thickening: An inflamed appendix often shows a thickened wall (>2 mm).
Increased Echogenicity: Surrounding fat may appear hyperechoic.
Peri-appendiceal Fluid: Look for any free fluid or abscess formation.
Non-compressibility: The inflamed appendix does not compress with the gentle pressure.
Additional Considerations:
Assess Nearby Structures: Assess the nearby structures to exclude any potential causes of RLQ pain like ectopic pregnancy or ovarian cysts in women or any other GI issues.
Compare with the Contralateral Side: At times, it becomes useful to compare it with what is expected on the left side of the anatomy to determine the extent of abnormality.
Limitation of the examination
Artifact Interference: Gas in the bowel can create artifacts that obscure the view of the appendix and make visualization difficult.
Difficulty Visualizing: In obese patients, it may become difficult to obtain adequate visualization of appendix.
5-Paracentesis
Evidence of Ascites accumulation through ultrasonography
Probe Selection
Low-Frequency Curved Array Probe:
Use: Ideal for abdominal imaging.
Frequency Range: 2-5 MHz.
Advantages: Provides good depth penetration, essential for visualizing deeper structures and fluid collections.
Elements of examination:
Static Approach:
Technique: The static approach is done using ultrasound where the anticipated region of needle placement is detected and marked before the procedure is done. Abdomen is physically examined with a view of identifying some of the accumulations of fluids, a right location to access the fluid is then identified.
Advantages: This method allows to careful plan and ensures that the needle is inserted in most appropriate area, reducing the risk of complications.
They help the physician to determine exact depth of the target fluid and thereby increases the chances of penetrating correct target and not the surrounding tissues.
Dynamic Approach:
Technique: The dynamic approach implies the ultrasound imaging during the paracentesis process when it is being performed. The ultrasound probe remains in contact with the patient’s skin while the needle is inserted; this way the operator gets real time view of the needle path and its neighbouring fluid.
Advantages: This approach leads to constant feedback, thus great flexibility in changing the position of the needle if required. It can help avoid injury to nearby organs and vessels and can improve the accuracy of fluid aspiration.
Some discomfort or pain may be encountered by patient during the procedure, especially if pressure is applied on the ultrasound transducer or the there is a painful pathology.
In some conditions like abdominal wall hernias or unstable fracture, the examination might possibly cause a deterioration in such conditions.
Interpretive errors of ultrasound images can result to either false-positive or false-negative implying on patient management. This risk is reduced when the training provided to the practitioners is sufficient, as well as some of the measures taken regarding quality assurance.
Bedside ultrasonography is also further limited that is the ’real-time’ imaging technique and imaging field confined to the size of the probe used hence limited in comparison to comprehensive scanning imaging series like a CT or MRI.
Both our subscription plans include Free CME/CPD AMA PRA Category 1 credits.

On course completion, you will receive a full-sized presentation quality digital certificate.
A dynamic medical simulation platform designed to train healthcare professionals and students to effectively run code situations through an immersive hands-on experience in a live, interactive 3D environment.

When you have your licenses, certificates and CMEs in one place, it's easier to track your career growth. You can easily share these with hospitals as well, using your medtigo app.


