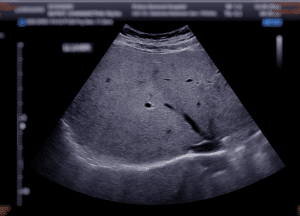
Cirrhosis can be defined as the terminal stages of chronic liver disease that is characterized by fibrosis, nodular regeneration of the liver tissue. Imaging is very valuable in the confirmation of the diagnosis, evaluation of the severity of cirrhosis, identification of complicating factors and follow up of the disease process.
Figure 1: Ultrasound upper abdomen showing liver
Key imaging modalities used in cirrhosis:
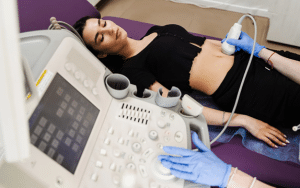
Abdominal ultrasonography is the most employed initial imaging tool in assessment of liver in cirrhosis because of its availability, affordability and free from radiation exposure.
It allows visualisation of the cross-sectional images of the liver and their surrounding structures and is more anatomical than ultrasound.
MRI is utilized to demonstrate liver masses, fibrosis, and the changes in parenchymal circulation in cirrhosis.
Fibro-elastic as well as transient elastography, also known as Fibro Scan, is a unique non-invasive test that quantifies the stiffness of the liver that is proportional to the level of fibrosis.
Though now primarily replaced by non-invasive imaging, angiography can still be used in cases where more detailed vascular imaging is needed, particularly in cases of portal vein thrombosis or varices.
Indications
Assessment of Complications:
Portal Hypertension: Doppler ultrasound to evaluate dimensions and blood flow of the portal vein and for searching a signs of portal hypertension.
Ascites: To determine the presence and amount of fluid that is in the abdominal cavity, an ultrasonic test will be used.
Esophageal Varices: Endoscopy in which actual visual inspection is done, although imaging may point towards varices.
Liver Lesions and Hepatocellular Carcinoma (HCC) Surveillance: Ultrasound: Routine evaluation of the liver nodules and surveillance in the at-risk population.
CT scan/MRI: Evaluation of suspicious lesion for staging of HCC or for evaluating the spread of the tumor.
Contraindications
Outcomes
Ultrasound for cirrhosis imaging
Ultrasound for examination of cirrhosis
Step 1-Patient positioning:
Supine and Left lateral are preferred patient positions.
Step 2-Liver Scanning:
Liver Size & Shape: First, scan the liver in the subcostal and intercostal areas to evaluate its size, configuration, and location. Increased or decreased sizes of livers might show different stages of cirrhosis.
Liver Texture: Cirrhosis results in an inconsistent and nodular liver texture. Make sure to check for any abnormalities as concerns the liver parenchyma.
Surface Nodularity: Look for nodular liver surfaces characteristic of cirrhosis. Use the transducer at a lower angle to delineate irregularities along the liver capsule.
Step 3- Fibrosis & Elastography (Optional)
Elastography: Use either transient elastography or shear wave elastography, if available, to measure liver stiffness. Elevated liver stiffness should be used as evidence for the presence of fibrosis, a classic finding in cirrhosis.
The following two tests mainly involve the Portal Vein Doppler study along with Doppler ultrasound.
Assessing Portal Hypertension: To assess the flow in the portal vein use doppler ultrasonography. Asses for signs of portal hypertension including increased portal vein of the diameter.
Collateral Vessels: One should look for signs of collateral vessels, which may develop due to portal hypertension.
Step 4-Spleen Examination:
Splenomegaly: Look for splenomegaly since it’s one of the characteristic features when cirrhosis is present together with portal hypertension.
Step 5-Hepatic Vasculature:
Hepatic Veins: Evaluate changes of the hepatic veins and the IVC which may indicate cirrhosis in its advanced stage.
Portal Vein: Appearance of the portal vein and any signs of thrombosis or pathologic blood flow patterns in the vessel.
Step 6-Conclusion and Reporting:
Findings Summary: Important findings include liver size, surface nodularity, parenchymal texture, portal vein characteristics, ascites, or the presence of collateral vessels.
Staging: Using an ultrasound, the cirrhosis can be staged as mild, moderate, or severe. Staging is helpful in making management and treatment decisions.
MRI technique for cirrhosis imaging
Step 1-Preparation:
Patient preparation: The patient is mainly required to fast to avoid the accumulation of gases in the stomach and bowels that would affect the imaging outcome.
Contrast agent: In some instances, the use of gadolinium-based contrast material may be applied to improve the imaging and specifically to visualize a liver lesion or a blood flow disturbance.
Step 2-Positioning:
The patient lies in the supine position.
A body coil (receiver coil) is placed over the abdomen to obtain high-resolution liver images.
Step 3-Image Acquisition:
T1-weighted images: They are employed to evaluate the position and structure of liver; to indicate fat infiltration in liver; and to determine focal lesions.
T2-weighted images: Some characteristics which may be highlighted include fibrosis, cirrhotic nodules and ascites together with inflammation and fluid.
Diffusion-weighted imaging (DWI): It can be used to diagnose liver fibrosis and small tumors since it quantifies the motion of water molecules in the organs.
MR Elastography: Determines the extent of fiber formation in the liver tissue by assessing the consistency of the liver.
Dynamic contrast-enhanced imaging (with gadolinium): Obtain images at arterial phase, portal venous phase and delayed phase to study blood flow and lesion such as hepatocellular carcinoma (HCC).
Step 4-Post-processing:
The pictures are reviewed and quantified for evaluation of liver size and shape, surface modularity and presence of fibrosis or cirrhosis-related complication such as ascites or varices.
Step 5-Interpretation:
To evaluate levels of liver fibrosis and the stage of cirrhosis, radiologists analyze the images and identify additional disorders such as hepatocellular carcinoma, portal hypertension, or varices.
Nuclear imaging technique for cirrhosis imaging
Step 1-Patient Preparation:
Minimal preparation is needed. The patient may be advised to hydrate and may need to remove metallic objects.
Step 2-Radiotracer Injection:
A small amount of a radiotracer (typically Technetium-99m sulfur colloid) is injected intravenously. This tracer is taken up by the liver’s Kupffer cells (specialized macrophages).
The tracer also accumulates in the spleen and bone marrow, particularly in cirrhosis, due to decreased liver function and portal hypertension.
Step 3-Imaging Acquisition:
The patient lies down on the scanning table.
The gamma camera captures images of the liver, spleen, and bone marrow by detecting gamma rays that have been emitted by the radiotracer.
In SPECT, the camera rotates around the body to create 3D images.
The process may take 30–60 minutes, depending on the technique.
Step 4-Scan Interpretation:
A healthy liver absorbs most of the tracer, while in cirrhosis, there’s reduced liver uptake, increased spleen or bone marrow uptake, and possible splenomegaly.
Abnormal patterns can indicate:
Hepatic dysfunction (reduced liver uptake)
Portal hypertension (increased spleen or bone marrow uptake)
Step 5-Post-scan Monitoring:
The radiotracer is generally safe and is naturally excreted from the body within a few hours to days. Hydration is encouraged.
Step 6-Image Analysis:
A nuclear medicine specialist interprets the scans, identifying signs of cirrhosis, such as poor liver function, enlarged spleen, and portal hypertension.
CT scan technique for cirrhosis imaging
Step 1-Patient Preparation:
Fasting: Before the scan, the patient is often asked to fast for 4 to 6 hours.
Contrast Media: Contrast medium (mainly iodine) may be injected intravenously to improve the visualisation of liver structures, blood vessels and pathologies. Before the use of any contrast material to be administered to the patient during the procedure, they are first tested for any form of allergic reaction.
Step 2-Patient Positioning:
Positioning: The patient’s position during the CT scan is in supine position that is lying flat on his or back on the CT scanner table.
Breathing Instructions: The technician will instruct the patient to hold their breath at specific times during the scan to minimize motion and obtain clear liver images.
Step 3-Pre-Scan Calibration:
The CT scanner calibrates for proper positioning and correct settings. The machine determines how much radiation is required to take the picture depending on the size of the patient’s body, among other factors.
Step 4-CT Acquisition Phases:
The liver CT scan is often performed in multiple phases to capture dynamic information as contrast circulates through the liver.
Non-Contrast Phase: The initial scan performed does not contain contrast to check the structural, proportional, and impregnation properties of the liver.
Arterial Phase (25-30 seconds after contrast injection): Images as soon as the ”first” arrives in the arteries including the hepatic artery for assessment of hyper vascular lesions.
Portal Venous Phase (60-70 seconds post-injection): Emphasizes aspects of the portal vein and the liver parenchyma that may depict the perfusion alterations usually seen in cirrhosis particularly the portal hypertension.
Delayed Phase (5-10 minutes post-injection): Such pictures are made as contrast is washed out of the liver and one sees nodules and scar tissue that defines cirrhosis.
Step 5-Image Processing and Reconstruction:
Slice Acquisition: Using multiple cross-sectional images which can be reconstructed in a three-dimensional field, the CT scanner scans the liver.
Image Reconstruction: CT and MRI create images of the liver from various angles and planes and shows features of cirrhosis like nodular liver surface, small liver lobes or large caudate lobe.
Step 6-Post-Processing for Cirrhosis Evaluation:
Measuring Liver Surface Nodularity: The liver surface is examined by radiologists for modularity, a sign of cirrhosis, and the spleen size.
Liver Volume Analysis: Relative size of various liver segments (for example if right hepatic lobe is hypoplastic, caudate lobe is hypertrophic) is suggestive of cirrhosis.
Evaluation of Ascites and Splenomegaly: CT studies aid in diagnosis of ascites which is a manifestation of portal hypertension in cirrhosis as well as splenomegaly.
Collaterals and Varices: CT imaging identifies the collateral vessels or varices that develop from portal hypertension.
Step 7-Radiologist’s Interpretation:
The radiologist analyzes the images for classic signs of cirrhosis: fatty liver change, reduction in size of liver, modularity and portal hypertension, splenomegaly and any of its complications such as hepatocellular carcinoma.
For analysis and comparison with clinical symptoms they are combined with findings from other imaging modalities, if necessary, may be ultrasound or MRI.
Step 8-Report and Follow-Up:
Diagnostic Report: The findings are in aggregate with distal appendage into a report and returned to the referring physician. The report may also contain a recommendation for further management depending on the severity of cirrhosis or complications that have been seen.
Follow-Up Imaging: If indicated by the results, subsequent CT scans are recommended to evaluate the change in the diseases status or response to the treatment.
Cirrhosis can be defined as the terminal stages of chronic liver disease that is characterized by fibrosis, nodular regeneration of the liver tissue. Imaging is very valuable in the confirmation of the diagnosis, evaluation of the severity of cirrhosis, identification of complicating factors and follow up of the disease process.
Figure 1: Ultrasound upper abdomen showing liver
Key imaging modalities used in cirrhosis:
Abdominal ultrasonography is the most employed initial imaging tool in assessment of liver in cirrhosis because of its availability, affordability and free from radiation exposure.
It allows visualisation of the cross-sectional images of the liver and their surrounding structures and is more anatomical than ultrasound.
MRI is utilized to demonstrate liver masses, fibrosis, and the changes in parenchymal circulation in cirrhosis.
Fibro-elastic as well as transient elastography, also known as Fibro Scan, is a unique non-invasive test that quantifies the stiffness of the liver that is proportional to the level of fibrosis.
Though now primarily replaced by non-invasive imaging, angiography can still be used in cases where more detailed vascular imaging is needed, particularly in cases of portal vein thrombosis or varices.
Assessment of Complications:
Portal Hypertension: Doppler ultrasound to evaluate dimensions and blood flow of the portal vein and for searching a signs of portal hypertension.
Ascites: To determine the presence and amount of fluid that is in the abdominal cavity, an ultrasonic test will be used.
Esophageal Varices: Endoscopy in which actual visual inspection is done, although imaging may point towards varices.
Liver Lesions and Hepatocellular Carcinoma (HCC) Surveillance: Ultrasound: Routine evaluation of the liver nodules and surveillance in the at-risk population.
CT scan/MRI: Evaluation of suspicious lesion for staging of HCC or for evaluating the spread of the tumor.
Ultrasound for examination of cirrhosis
Step 1-Patient positioning:
Supine and Left lateral are preferred patient positions.
Step 2-Liver Scanning:
Liver Size & Shape: First, scan the liver in the subcostal and intercostal areas to evaluate its size, configuration, and location. Increased or decreased sizes of livers might show different stages of cirrhosis.
Liver Texture: Cirrhosis results in an inconsistent and nodular liver texture. Make sure to check for any abnormalities as concerns the liver parenchyma.
Surface Nodularity: Look for nodular liver surfaces characteristic of cirrhosis. Use the transducer at a lower angle to delineate irregularities along the liver capsule.
Step 3- Fibrosis & Elastography (Optional)
Elastography: Use either transient elastography or shear wave elastography, if available, to measure liver stiffness. Elevated liver stiffness should be used as evidence for the presence of fibrosis, a classic finding in cirrhosis.
The following two tests mainly involve the Portal Vein Doppler study along with Doppler ultrasound.
Assessing Portal Hypertension: To assess the flow in the portal vein use doppler ultrasonography. Asses for signs of portal hypertension including increased portal vein of the diameter.
Collateral Vessels: One should look for signs of collateral vessels, which may develop due to portal hypertension.
Step 4-Spleen Examination:
Splenomegaly: Look for splenomegaly since it’s one of the characteristic features when cirrhosis is present together with portal hypertension.
Step 5-Hepatic Vasculature:
Hepatic Veins: Evaluate changes of the hepatic veins and the IVC which may indicate cirrhosis in its advanced stage.
Portal Vein: Appearance of the portal vein and any signs of thrombosis or pathologic blood flow patterns in the vessel.
Step 6-Conclusion and Reporting:
Findings Summary: Important findings include liver size, surface nodularity, parenchymal texture, portal vein characteristics, ascites, or the presence of collateral vessels.
Staging: Using an ultrasound, the cirrhosis can be staged as mild, moderate, or severe. Staging is helpful in making management and treatment decisions.
Step 1-Preparation:
Patient preparation: The patient is mainly required to fast to avoid the accumulation of gases in the stomach and bowels that would affect the imaging outcome.
Contrast agent: In some instances, the use of gadolinium-based contrast material may be applied to improve the imaging and specifically to visualize a liver lesion or a blood flow disturbance.
Step 2-Positioning:
The patient lies in the supine position.
A body coil (receiver coil) is placed over the abdomen to obtain high-resolution liver images.
Step 3-Image Acquisition:
T1-weighted images: They are employed to evaluate the position and structure of liver; to indicate fat infiltration in liver; and to determine focal lesions.
T2-weighted images: Some characteristics which may be highlighted include fibrosis, cirrhotic nodules and ascites together with inflammation and fluid.
Diffusion-weighted imaging (DWI): It can be used to diagnose liver fibrosis and small tumors since it quantifies the motion of water molecules in the organs.
MR Elastography: Determines the extent of fiber formation in the liver tissue by assessing the consistency of the liver.
Dynamic contrast-enhanced imaging (with gadolinium): Obtain images at arterial phase, portal venous phase and delayed phase to study blood flow and lesion such as hepatocellular carcinoma (HCC).
Step 4-Post-processing:
The pictures are reviewed and quantified for evaluation of liver size and shape, surface modularity and presence of fibrosis or cirrhosis-related complication such as ascites or varices.
Step 5-Interpretation:
To evaluate levels of liver fibrosis and the stage of cirrhosis, radiologists analyze the images and identify additional disorders such as hepatocellular carcinoma, portal hypertension, or varices.
Step 1-Patient Preparation:
Minimal preparation is needed. The patient may be advised to hydrate and may need to remove metallic objects.
Step 2-Radiotracer Injection:
A small amount of a radiotracer (typically Technetium-99m sulfur colloid) is injected intravenously. This tracer is taken up by the liver’s Kupffer cells (specialized macrophages).
The tracer also accumulates in the spleen and bone marrow, particularly in cirrhosis, due to decreased liver function and portal hypertension.
Step 3-Imaging Acquisition:
The patient lies down on the scanning table.
The gamma camera captures images of the liver, spleen, and bone marrow by detecting gamma rays that have been emitted by the radiotracer.
In SPECT, the camera rotates around the body to create 3D images.
The process may take 30–60 minutes, depending on the technique.
Step 4-Scan Interpretation:
A healthy liver absorbs most of the tracer, while in cirrhosis, there’s reduced liver uptake, increased spleen or bone marrow uptake, and possible splenomegaly.
Abnormal patterns can indicate:
Hepatic dysfunction (reduced liver uptake)
Portal hypertension (increased spleen or bone marrow uptake)
Step 5-Post-scan Monitoring:
The radiotracer is generally safe and is naturally excreted from the body within a few hours to days. Hydration is encouraged.
Step 6-Image Analysis:
A nuclear medicine specialist interprets the scans, identifying signs of cirrhosis, such as poor liver function, enlarged spleen, and portal hypertension.
Step 1-Patient Preparation:
Fasting: Before the scan, the patient is often asked to fast for 4 to 6 hours.
Contrast Media: Contrast medium (mainly iodine) may be injected intravenously to improve the visualisation of liver structures, blood vessels and pathologies. Before the use of any contrast material to be administered to the patient during the procedure, they are first tested for any form of allergic reaction.
Step 2-Patient Positioning:
Positioning: The patient’s position during the CT scan is in supine position that is lying flat on his or back on the CT scanner table.
Breathing Instructions: The technician will instruct the patient to hold their breath at specific times during the scan to minimize motion and obtain clear liver images.
Step 3-Pre-Scan Calibration:
The CT scanner calibrates for proper positioning and correct settings. The machine determines how much radiation is required to take the picture depending on the size of the patient’s body, among other factors.
Step 4-CT Acquisition Phases:
The liver CT scan is often performed in multiple phases to capture dynamic information as contrast circulates through the liver.
Non-Contrast Phase: The initial scan performed does not contain contrast to check the structural, proportional, and impregnation properties of the liver.
Arterial Phase (25-30 seconds after contrast injection): Images as soon as the ”first” arrives in the arteries including the hepatic artery for assessment of hyper vascular lesions.
Portal Venous Phase (60-70 seconds post-injection): Emphasizes aspects of the portal vein and the liver parenchyma that may depict the perfusion alterations usually seen in cirrhosis particularly the portal hypertension.
Delayed Phase (5-10 minutes post-injection): Such pictures are made as contrast is washed out of the liver and one sees nodules and scar tissue that defines cirrhosis.
Step 5-Image Processing and Reconstruction:
Slice Acquisition: Using multiple cross-sectional images which can be reconstructed in a three-dimensional field, the CT scanner scans the liver.
Image Reconstruction: CT and MRI create images of the liver from various angles and planes and shows features of cirrhosis like nodular liver surface, small liver lobes or large caudate lobe.
Step 6-Post-Processing for Cirrhosis Evaluation:
Measuring Liver Surface Nodularity: The liver surface is examined by radiologists for modularity, a sign of cirrhosis, and the spleen size.
Liver Volume Analysis: Relative size of various liver segments (for example if right hepatic lobe is hypoplastic, caudate lobe is hypertrophic) is suggestive of cirrhosis.
Evaluation of Ascites and Splenomegaly: CT studies aid in diagnosis of ascites which is a manifestation of portal hypertension in cirrhosis as well as splenomegaly.
Collaterals and Varices: CT imaging identifies the collateral vessels or varices that develop from portal hypertension.
Step 7-Radiologist’s Interpretation:
The radiologist analyzes the images for classic signs of cirrhosis: fatty liver change, reduction in size of liver, modularity and portal hypertension, splenomegaly and any of its complications such as hepatocellular carcinoma.
For analysis and comparison with clinical symptoms they are combined with findings from other imaging modalities, if necessary, may be ultrasound or MRI.
Step 8-Report and Follow-Up:
Diagnostic Report: The findings are in aggregate with distal appendage into a report and returned to the referring physician. The report may also contain a recommendation for further management depending on the severity of cirrhosis or complications that have been seen.
Follow-Up Imaging: If indicated by the results, subsequent CT scans are recommended to evaluate the change in the diseases status or response to the treatment.
Both our subscription plans include Free CME/CPD AMA PRA Category 1 credits.
Digital Certificate PDF
On course completion, you will receive a full-sized presentation quality digital certificate.
medtigo Simulation
A dynamic medical simulation platform designed to train healthcare professionals and students to effectively run code situations through an immersive hands-on experience in a live, interactive 3D environment.
medtigo Points
medtigo points is our unique point redemption system created to award users for interacting on our site. These points can be redeemed for special discounts on the medtigo marketplace as well as towards the membership cost itself.
Community Forum post/reply = 5 points
*Redemption of points can occur only through the medtigo marketplace, courses, or simulation system. Money will not be credited to your bank account. 10 points = $1.
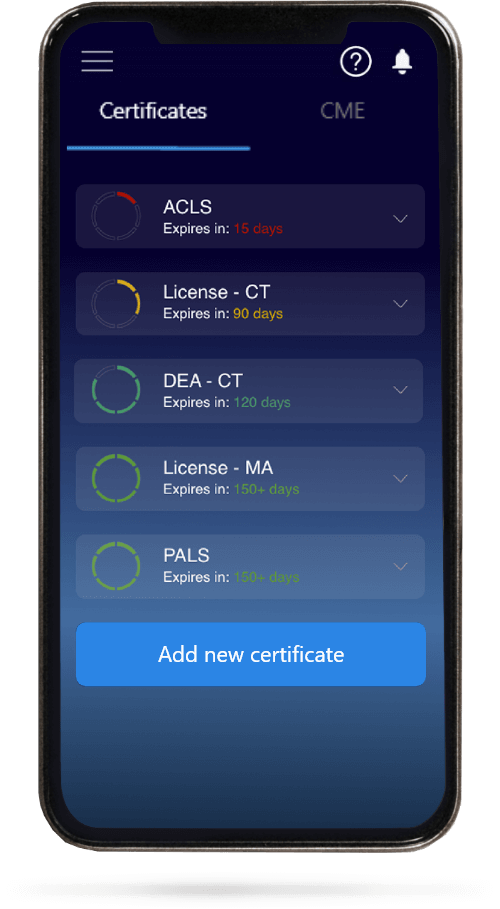
All Your Certificates in One Place
When you have your licenses, certificates and CMEs in one place, it's easier to track your career growth. You can easily share these with hospitals as well, using your medtigo app.