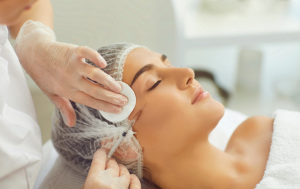
Autologous fat transfer or facial fat grafting is a form of aesthetic surgery in which fat from one area of the patient’s body is relocated to the face. This technique is quite helpful in the restoration of the volume in certain parts of the body that tend to have sagged or peeled because of aging, weight loss among other causes. This is done commonly in cosmetic surgery to augment the chin, cheek and jaw line, reduce facial wrinkles and to give the skin a youthful appearance.
Indications
Facial volume loss: Like skin laxity seen in aging or after weight loss, particularly in the regions of the cheeks, temple, and beneath the eyes. Fat grafting can revitalize the area and give back its younger looking fullness and complexion.
Facial contour enhancement: Primarily for the Jawline, chin, cheek and to correct uneven face.
Wrinkles and fine Lines: With fat grafting it is possible to fill deeper wrinkles such as, nasolabial folds, marionette lines or periorbital lines, which is a more natural approach compared to injection fillers.
Post-surgical or post-traumatic reconstruction: For patient who requires volume enhancement after they have done face lifting or after undergoing surgery where their face has been deformed due to trauma, among other reasons.
Burn scars and defects: Lipofilling is normally performed to enhance the aesthetic value of burn scar or skin defects that causes skin roughness or skin volume inequality.
Contraindications
Active infection or inflammation: Any active infection in the body especially around the area of fat harvesting or grafting is an absolute contraindication. It can lead to such complications as fat necrosis as well as poor graft survival.
Cancer or tumours: Patients with any form of cancer, especially those with localized diseases in areas where fat will be grafted, such as facial malignancies, should not undergo fat grafting as they worsen the tissue by irritating the cancerous cells or spread the cancer.
Uncontrolled systemic diseases: Absolute contraindications include poorly controlled diabetes; autoimmune diseases; other significant systemic diseases that would compromise the individual’s ability to heal or that might increase the risk of complications following facial fat grafting.
Poor skin quality or excessive skin laxity: Patients with thin, suboptimal quality skin or skin that has become too flaccid may also have a problem of fat graft retention because their skin is unable to give adequate support to the grafted fat.
History of severe allergic reactions or anaphylaxis: Facial fat grafting should be done under close supervision if a patient too has serious allergic reactions to a certain medication or anesthetic agents in the past.
Outcomes
Equipment
Fat Harvesting Instruments:
Liposuction Cannulas
Syringes and Liposuction Systems
Fat Harvesting Pumps
Fat Purification Equipment:
Centrifuge
Filtration Devices
Injection Tools:
Microcannulas
Syringes
Needles
Anesthesia Equipment:
Sterile Drills and Cannulas
Post-Procedure Care Equipment:
Compression Garments
Cooling Pads
Patient preparation
Preoperative consultation
Medical history review: Specifically, the patient’s medical history should be reviewed to determine possible exclusion criteria: Presence of chronic illnesses (diabetes, autoimmune or bleeding disorders) etc.
Psychological evaluation: Ask the patient about the expectations they have out of the treatment and should set them right if their expected outcome is unconventional. Ask patients regarding their expectations from facial fat grafting and make them aware of the surgical drawbacks.
Physical exam: Examine the face and evaluate what areas could select to be augmented with adipose tissue. To help the surgeon map out the position where the incisions will be made, the surgeon may take pictures.
Pre-operative Instructions:
Discontinue certain medications: Encourage patients to avoid using blood thinning agents such as aspirin for one to two weeks before operation to avoid bleeding.
Hydration: Specifically, remind the patient to drink a lot of fluids for several days before the surgery.
Skin care: Maintain a good skincare regimen, especially in the area to receive fat transfer. A clean face is essential to reduce the risk of infection.
Patient position
Supine position: The patient is often positioned in supine position on the operation table. This is the most common position because it offers the surgeon easy access to the face to harvest fat and to insert the fat in the sites to be augmented.
Head elevated: The head of the operating table can be inclined slightly upwards (to about 30 to 45 degrees). This can help reduce swelling and improve access to the facial areas where fat will be grafted.
Technique
Step 1-Consultation and planning:
Patient evaluation: During this stage, the surgeon examines the patient’s face and skin and determines where fat grafting would be useful like under eyes areas, beside the nose, or cheekbones.
Donor site selection: The areas that usually have sufficient fat, the abdomens, thighs, or flanks are used for harvesting.
Discussion of results and expectations: Both the surgeon and patient define what outcome is anticipated, the likelihood of fat absorption, and the potential adverse effects.
Step 2-Preoperative preparation:
Anesthesia: Local anaesthesia or intravenous sedation is used to make the patient comfortable during the operation. At times more complex procedures may require the use of general anesthesia.
Marking: Both the donor area of the skin and the area to which the skin is taken are drawn as well by a technician on the patient’s face.
Step 3-Fat harvesting:
Liposuction technique: The surgeon uses a cannula (a small, hollow tube) attached to a syringe or suction device to gently suction the fat from the donor area.
Small incisions: Small incisions (usually 2-4 mm) are made in the donor area, and the cannula is inserted. The fat is carefully aspirated to avoid damaging the fat cells.
Purification of fat: The extracted fat is purified and processed to separate the healthy fat cells from blood, oil, and other contaminants. This is typically done through centrifugation or filtration techniques.
Step 4-Preparation of recipient area:
Cleaning and numbing: The recipient areas (such as the cheeks or under-eye area) are cleaned, and local anesthesia is applied to numb the regions where the fat will be injected.
Step 5-Fat injection:
Layered Injection: The surgeon injects the purified fat into the facial area in small amounts using a fine needle or cannula. The fat is injected in layers, starting deeper and gradually moving toward the surface, to create a smooth, natural appearance.
Strategic placement: The surgeon strategically places the fat in specific areas to achieve the desired contour and restore volume to areas that have experienced facial volume loss.
Massage and shaping: After each injection, the surgeon may massage and shape the areas to ensure even distribution of the fat.
Step 6-Postoperative Care:
Immediate aftercare: The patient may experience some swelling, bruising, or mild discomfort, which is normal. The surgeon may apply bandages or a compression garment to reduce swelling.
Follow-up appointments: The patient typically returns for follow-up visits to monitor healing and assess the results. Additional touch-up procedures may be needed, as some of the injected fat can be reabsorbed by the body over time.
Step 7-Recovery and results:
Healing: Swelling usually peaks within the first 48 to 72 hours and subsides within 1-2 weeks. Bruising may take several weeks to fully resolve.
Long-term outcome: The results can be seen in about 3-6 months. Some of the fat may be resorbed by the body, so a slight loss in volume is expected. Over time, however, the remaining fat stabilizes and gives long-lasting results.
Complications
Infection: Like in any form of surgery there is a possibility of high risk of infection. These are redness, swelling, fever, and pus like discharge from part of the body especially where the surgery was done.
Fat absorption: A significant portion of the fat injected may not survive and be absorbed by the body. This can result in less volume retention than expected, requiring additional grafts.
Fat necrosis: Sometimes, the fat cells may not survive, leading to fat necrosis (death of the fat tissue). This can cause firm lumps or cysts that may require surgical removal.
Uneven results: If the fat grafting is not equal on both sides, an uneven or lumpy appearance results. These can be corrected through touch-up procedures, and sometimes there can still be some uneven results.
Scarring: Scarring does occur, even though most of the incisions are small. If there has been an infection or a bad healing process, more extensive scarring can develop.
Asymmetry: There is a possibility of uneven healing of the face and unequal results on either side of the face.
Overcorrection:
In some instances, too much fat is injected, which may create a puffed or unnatural look and may necessitate a revision procedure to rectify.
Autologous fat transfer or facial fat grafting is a form of aesthetic surgery in which fat from one area of the patient’s body is relocated to the face. This technique is quite helpful in the restoration of the volume in certain parts of the body that tend to have sagged or peeled because of aging, weight loss among other causes. This is done commonly in cosmetic surgery to augment the chin, cheek and jaw line, reduce facial wrinkles and to give the skin a youthful appearance.
Facial volume loss: Like skin laxity seen in aging or after weight loss, particularly in the regions of the cheeks, temple, and beneath the eyes. Fat grafting can revitalize the area and give back its younger looking fullness and complexion.
Facial contour enhancement: Primarily for the Jawline, chin, cheek and to correct uneven face.
Wrinkles and fine Lines: With fat grafting it is possible to fill deeper wrinkles such as, nasolabial folds, marionette lines or periorbital lines, which is a more natural approach compared to injection fillers.
Post-surgical or post-traumatic reconstruction: For patient who requires volume enhancement after they have done face lifting or after undergoing surgery where their face has been deformed due to trauma, among other reasons.
Burn scars and defects: Lipofilling is normally performed to enhance the aesthetic value of burn scar or skin defects that causes skin roughness or skin volume inequality.
Active infection or inflammation: Any active infection in the body especially around the area of fat harvesting or grafting is an absolute contraindication. It can lead to such complications as fat necrosis as well as poor graft survival.
Cancer or tumours: Patients with any form of cancer, especially those with localized diseases in areas where fat will be grafted, such as facial malignancies, should not undergo fat grafting as they worsen the tissue by irritating the cancerous cells or spread the cancer.
Uncontrolled systemic diseases: Absolute contraindications include poorly controlled diabetes; autoimmune diseases; other significant systemic diseases that would compromise the individual’s ability to heal or that might increase the risk of complications following facial fat grafting.
Poor skin quality or excessive skin laxity: Patients with thin, suboptimal quality skin or skin that has become too flaccid may also have a problem of fat graft retention because their skin is unable to give adequate support to the grafted fat.
History of severe allergic reactions or anaphylaxis: Facial fat grafting should be done under close supervision if a patient too has serious allergic reactions to a certain medication or anesthetic agents in the past.
Fat Harvesting Instruments:
Liposuction Cannulas
Syringes and Liposuction Systems
Fat Harvesting Pumps
Fat Purification Equipment:
Centrifuge
Filtration Devices
Injection Tools:
Microcannulas
Syringes
Needles
Anesthesia Equipment:
Sterile Drills and Cannulas
Post-Procedure Care Equipment:
Compression Garments
Cooling Pads
Preoperative consultation
Medical history review: Specifically, the patient’s medical history should be reviewed to determine possible exclusion criteria: Presence of chronic illnesses (diabetes, autoimmune or bleeding disorders) etc.
Psychological evaluation: Ask the patient about the expectations they have out of the treatment and should set them right if their expected outcome is unconventional. Ask patients regarding their expectations from facial fat grafting and make them aware of the surgical drawbacks.
Physical exam: Examine the face and evaluate what areas could select to be augmented with adipose tissue. To help the surgeon map out the position where the incisions will be made, the surgeon may take pictures.
Pre-operative Instructions:
Discontinue certain medications: Encourage patients to avoid using blood thinning agents such as aspirin for one to two weeks before operation to avoid bleeding.
Hydration: Specifically, remind the patient to drink a lot of fluids for several days before the surgery.
Skin care: Maintain a good skincare regimen, especially in the area to receive fat transfer. A clean face is essential to reduce the risk of infection.
Supine position: The patient is often positioned in supine position on the operation table. This is the most common position because it offers the surgeon easy access to the face to harvest fat and to insert the fat in the sites to be augmented.
Head elevated: The head of the operating table can be inclined slightly upwards (to about 30 to 45 degrees). This can help reduce swelling and improve access to the facial areas where fat will be grafted.
Step 1-Consultation and planning:
Patient evaluation: During this stage, the surgeon examines the patient’s face and skin and determines where fat grafting would be useful like under eyes areas, beside the nose, or cheekbones.
Donor site selection: The areas that usually have sufficient fat, the abdomens, thighs, or flanks are used for harvesting.
Discussion of results and expectations: Both the surgeon and patient define what outcome is anticipated, the likelihood of fat absorption, and the potential adverse effects.
Step 2-Preoperative preparation:
Anesthesia: Local anaesthesia or intravenous sedation is used to make the patient comfortable during the operation. At times more complex procedures may require the use of general anesthesia.
Marking: Both the donor area of the skin and the area to which the skin is taken are drawn as well by a technician on the patient’s face.
Step 3-Fat harvesting:
Liposuction technique: The surgeon uses a cannula (a small, hollow tube) attached to a syringe or suction device to gently suction the fat from the donor area.
Small incisions: Small incisions (usually 2-4 mm) are made in the donor area, and the cannula is inserted. The fat is carefully aspirated to avoid damaging the fat cells.
Purification of fat: The extracted fat is purified and processed to separate the healthy fat cells from blood, oil, and other contaminants. This is typically done through centrifugation or filtration techniques.
Step 4-Preparation of recipient area:
Cleaning and numbing: The recipient areas (such as the cheeks or under-eye area) are cleaned, and local anesthesia is applied to numb the regions where the fat will be injected.
Step 5-Fat injection:
Layered Injection: The surgeon injects the purified fat into the facial area in small amounts using a fine needle or cannula. The fat is injected in layers, starting deeper and gradually moving toward the surface, to create a smooth, natural appearance.
Strategic placement: The surgeon strategically places the fat in specific areas to achieve the desired contour and restore volume to areas that have experienced facial volume loss.
Massage and shaping: After each injection, the surgeon may massage and shape the areas to ensure even distribution of the fat.
Step 6-Postoperative Care:
Immediate aftercare: The patient may experience some swelling, bruising, or mild discomfort, which is normal. The surgeon may apply bandages or a compression garment to reduce swelling.
Follow-up appointments: The patient typically returns for follow-up visits to monitor healing and assess the results. Additional touch-up procedures may be needed, as some of the injected fat can be reabsorbed by the body over time.
Step 7-Recovery and results:
Healing: Swelling usually peaks within the first 48 to 72 hours and subsides within 1-2 weeks. Bruising may take several weeks to fully resolve.
Long-term outcome: The results can be seen in about 3-6 months. Some of the fat may be resorbed by the body, so a slight loss in volume is expected. Over time, however, the remaining fat stabilizes and gives long-lasting results.
Infection: Like in any form of surgery there is a possibility of high risk of infection. These are redness, swelling, fever, and pus like discharge from part of the body especially where the surgery was done.
Fat absorption: A significant portion of the fat injected may not survive and be absorbed by the body. This can result in less volume retention than expected, requiring additional grafts.
Fat necrosis: Sometimes, the fat cells may not survive, leading to fat necrosis (death of the fat tissue). This can cause firm lumps or cysts that may require surgical removal.
Uneven results: If the fat grafting is not equal on both sides, an uneven or lumpy appearance results. These can be corrected through touch-up procedures, and sometimes there can still be some uneven results.
Scarring: Scarring does occur, even though most of the incisions are small. If there has been an infection or a bad healing process, more extensive scarring can develop.
Asymmetry: There is a possibility of uneven healing of the face and unequal results on either side of the face.
Overcorrection:
In some instances, too much fat is injected, which may create a puffed or unnatural look and may necessitate a revision procedure to rectify.
Both our subscription plans include Free CME/CPD AMA PRA Category 1 credits.
Digital Certificate PDF
On course completion, you will receive a full-sized presentation quality digital certificate.
medtigo Simulation
A dynamic medical simulation platform designed to train healthcare professionals and students to effectively run code situations through an immersive hands-on experience in a live, interactive 3D environment.
medtigo Points
medtigo points is our unique point redemption system created to award users for interacting on our site. These points can be redeemed for special discounts on the medtigo marketplace as well as towards the membership cost itself.
Community Forum post/reply = 5 points
*Redemption of points can occur only through the medtigo marketplace, courses, or simulation system. Money will not be credited to your bank account. 10 points = $1.
All Your Certificates in One Place
When you have your licenses, certificates and CMEs in one place, it's easier to track your career growth. You can easily share these with hospitals as well, using your medtigo app.