Pericardiocentesis is a medical treatment which is used to remove fluid from the pericardial sac. It is a thin membrane that surrounds the heart. This treatment is performed to reduce the pressure on the heart which is caused by an excessive collection of fluid. This condition is known as pericardial effusion.
Pericardiocentesis is an effective operation to identify and treat the pericardial effusion and to reduce the reduce the symptoms and manage the underlying illness.
Indications
Cardiac Tamponade: This condition is the main clinical indication. Symptoms include dyspnea, thoracic pain, hypotension, and jugular vein distention.
Pericardial Effusion: Significant or fast increasing pericardial effusions can lead to tamponade which requires the use of pericardiocentesis.
Symptomatic pericarditis: Pericarditis refers to inflammation of the pericardial sac. Pericardiocentesis can help to reduce the symptoms like chest discomfort, pyrexia, and respiratory distress specifically if the effusion is hemorrhagic or purulent.
Diagnostic purposes: The examination of pericardial fluid can be used to identify the etiological factors which contribute to the effusion like infectious agents, neoplasms, or autoimmune disorders.
Contraindications
Uncorrected Coagulopathy: Pericardiocentesis can lead to bleeding complications, so it’s typically avoided in individuals with severe coagulation disorders or those taking anticoagulant medications.
Infection at the Puncture Site: Performing pericardiocentesis in the presence of local infection increases the risk of introducing bacteria into the pericardial space, potentially causing pericarditis or other serious infections.
Uncertain Diagnosis: If the indication for pericardiocentesis needs to be clarified or the procedure is likely to provide valuable diagnostic or therapeutic information, it may be postponed or avoided.
Outcomes
Patient preparation
Explain the risk, advantages, and other options of the procedure with the patient. Get their permission after telling them.
Baseline examinations is used to determine the status of patient like vital signs, an ECG, and a chest X-ray.
Make sure the patient has been informed of the risk and advantages of the procedure before signing a consent form.
Give the patient detailed instructions on what to expect before, during, and after the procedure like any dietary or activity limitations.
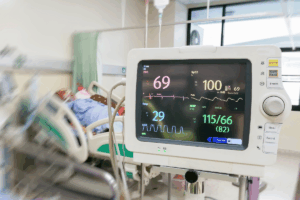
Arrange for continuous monitoring of the patient’s vital signs.
Position the patient comfortably on the procedure table, usually in a semi-recumbent or supine position with the head elevated.
Ensure all necessary equipment for the procedure, including sterile drapes, needles, syringes, and ultrasound machine, are readily available and properly prepared.
Provide proper post-procedure care instructions and arrange for follow-up appointments as needed.
Patient position
Pericardiocentesis, the procedure to drain fluid from the pericardial sac around the heart, is typically performed with the patient lying flat on their back, i.e., in a supine position. This position allows easy access to the pericardial space and provides stability during the procedure.
Emergent needle pericardiocentesis
Step 1 Make sure that an individual has a minimum one confirmed IV line, is getting extra oxygen support, and is linked to the continuous pulse oximetry with cardiac monitor.
Step 2 Identify the landmarks for needle insertion. Typically, this is done at the xiphoid process, i.e., the lower end of the sternum and directed towards the left shoulder.
Step 3 Consider using ultrasound guidance for more accurate localization, especially in cases where landmarks are difficult to palpate.
Step 4 The subxiphoid region should be surgically prepared and cleaned using the antiseptic solution.
Step 5 Administer local anesthesia to the skin and subcutaneous tissue at the insertion site to minimize discomfort.
Step 6 Create a small incision with a number 11 scalpel blade to the selected location.
Step 7 Once fluid is obtained, withdraw it from the pericardial sac into the syringe.
Step 8 Monitor the patient’s vital signs throughout the procedure, as rapid drainage of fluid can lead to hemodynamic changes.
Step 9 Five ml of normal saline should be aspirated into a 20 ml or 60 ml syringe after it is attached to the spinal needle.
Step 10 The periodic injection of maximum 1 mL of normal saline may help to maintain a needle lumen clear while the needle is being pushed.
Step 11 Place a spinal needle into the skin opening & guide it in the direction of the left shoulder. Keep a needle positioned 45 to the wall of the abdomen & 45 away from the sagittal plane midline. Whenever possible, utilize direct ultrasonographic instruction for the needle insertion procedure.
Ultrasound Guided Pericardiocentesis
Step 1 Use the ultrasound probe to locate the pericardial effusion. This is typically seen as an anechoic space between the visceral and parietal pericardium.
Step 2 Identify the best entry site for needle insertion. This is often in the subxiphoid region, but the location can vary depending on the patient’s anatomy and the distribution of the effusion.
Step 3 Make sure the patient is positioned with their head elevated between 30 to 45 degrees. This positioning promotes the combining of fluid in the direction of the lower and front part of the body, facilitating optimal drainage of fluids. step 4 Choose a location that is nearest to the pericardial cavity. Be sure to shave the skin meticulously to prevent any potential injury.
Step 5 Numb the area with lidocaine before making a small 5 mm incision to reduce resistance when inserting the needle.
Step 6 Make that the syringe holding the lidocaine 1% is connected to the opposite side of the needle attachment on the 3-way stopcock before placing the needle to it.
Step 7 Place a needle into the subxiphoid process on left side with fluoroscopic guidance. Push the syringe & needle till its tip is positioned behind the rib cage. Proceed to advance the needle in the direction of a shoulder at an angle ranging between 15 to 20 degrees from the wall of the abdomen.
Step 8 Gently retract the needle using suction within the syringe if the electrocardiogram indicates elevation of ST following the application of lidocaine to clear the needle.
Step 9 By injecting agitated saline—also known as saline echocontrast medium—through the needle, the position of the needle is verified.
Step 10 Once a needle is positioned within the space of pericardium, a flexible guidewire with a soft, pliable tip is carefully inserted through it. Gently encircle the heart with this guidewire.
Step 11 Following this step, withdraw the needle and introduce a supple catheter equipped with numerous side apertures along this wire.
Step 12 Ultrasound-guided pericardiocentesis typically involves the use of a specific type of catheter called a pigtail catheter.
Step 13 This catheter has a curved, pigtail-shaped tip that helps to prevent tissue damage as it’s inserted into the pericardial sac surrounding the heart.
Step 14 The pericardial catheter can remain in place within the cavity for twenty-four hours, facilitating continual closed drainage. Gravity is utilized to augment the drainage process.
Step 15 Ideally, the catheter ought to be withdrawn within twenty-four hours, as prolonged placement heightens the risk of infection within the pericardial cavity.
Step 16 Fluoroscopy guided pericardiocentesis emerges as a viable alternative for managing postoperative pericardial effusion, offering precise catheter localization in difficult scenarios where contrast echocardiography proves inadequate due to surgical artifacts and pulmonary issues.
Laboratory tests
Electrocardiogram: This is the most common test used to assess heart rhythm and electrical activity. It can help diagnose arrhythmias and determine if Transcutaneous Pacing is the right treatment for you.
Echocardiogram: This method can use ultrasonic waves to give a detailed picture of the heart which can be helpful to determine the anatomy and function. It can be used to assess the efficacy of transcutaneous pacing.
Complications
Bleeding: It is one of the most prevalent consequences. The needle used for pericardiocentesis may mistakenly puncture a blood artery which can cause hemorrhage.
Infection: When the skin breaks down, microorganisms can enter the body. Both the pericardial sac and the needle insertion site are prone to infection. This danger is reduced by using sterile methods during the treatment.
Arrhythmias: Pericardiocentesis may irritate the heart muscle, which leads to irregular heartbeats called arrhythmias.
puncture of neighboring tissues: In rare situations, the needle may inadvertently puncture structures near the pericardial sac like the heart muscle or the lungs. It may lead to serious effects like a pneumothorax or heart perforation.
Accumulation of fluid: Despite effective drainage, fluid may reaccumulate in the pericardial sac. It needs the repetition of the procedure or other methods.
Hemothorax or Hemopericardium: These complications involve blood collection in the chest cavity or within the pericardial sac, typically due to bleeding during the procedure.
Medication
Local Anesthetic: Before the procedure, a local anesthetic such as lidocaine may be administered to numb the skin and underlying tissues to minimize discomfort during the insertion of the needle.
Sedatives and Analgesics: Medications like midazolam or fentanyl is used to relax the patient. It is also used to manage the pain and anxiety during the procedure.
Anti-inflammatory Agents: Nonsteroidal anti-inflammatory drugs like ibuprofen or indomethacin are used to lower the inflammation and reduce the pain linked with pericarditis. It needs pericardiocentesis.
Pain Management: Analgesics such as acetaminophen or stronger opioids may be given post-procedure to manage any discomfort or pain.
Pericardiocentesis is a medical treatment which is used to remove fluid from the pericardial sac. It is a thin membrane that surrounds the heart. This treatment is performed to reduce the pressure on the heart which is caused by an excessive collection of fluid. This condition is known as pericardial effusion.
Pericardiocentesis is an effective operation to identify and treat the pericardial effusion and to reduce the reduce the symptoms and manage the underlying illness.
Cardiac Tamponade: This condition is the main clinical indication. Symptoms include dyspnea, thoracic pain, hypotension, and jugular vein distention.
Pericardial Effusion: Significant or fast increasing pericardial effusions can lead to tamponade which requires the use of pericardiocentesis.
Symptomatic pericarditis: Pericarditis refers to inflammation of the pericardial sac. Pericardiocentesis can help to reduce the symptoms like chest discomfort, pyrexia, and respiratory distress specifically if the effusion is hemorrhagic or purulent.
Diagnostic purposes: The examination of pericardial fluid can be used to identify the etiological factors which contribute to the effusion like infectious agents, neoplasms, or autoimmune disorders.
Uncorrected Coagulopathy: Pericardiocentesis can lead to bleeding complications, so it’s typically avoided in individuals with severe coagulation disorders or those taking anticoagulant medications.
Infection at the Puncture Site: Performing pericardiocentesis in the presence of local infection increases the risk of introducing bacteria into the pericardial space, potentially causing pericarditis or other serious infections.
Uncertain Diagnosis: If the indication for pericardiocentesis needs to be clarified or the procedure is likely to provide valuable diagnostic or therapeutic information, it may be postponed or avoided.
Explain the risk, advantages, and other options of the procedure with the patient. Get their permission after telling them.
Baseline examinations is used to determine the status of patient like vital signs, an ECG, and a chest X-ray.
Make sure the patient has been informed of the risk and advantages of the procedure before signing a consent form.
Give the patient detailed instructions on what to expect before, during, and after the procedure like any dietary or activity limitations.
Arrange for continuous monitoring of the patient’s vital signs.
Position the patient comfortably on the procedure table, usually in a semi-recumbent or supine position with the head elevated.
Ensure all necessary equipment for the procedure, including sterile drapes, needles, syringes, and ultrasound machine, are readily available and properly prepared.
Provide proper post-procedure care instructions and arrange for follow-up appointments as needed.
Pericardiocentesis, the procedure to drain fluid from the pericardial sac around the heart, is typically performed with the patient lying flat on their back, i.e., in a supine position. This position allows easy access to the pericardial space and provides stability during the procedure.
Step 1 Make sure that an individual has a minimum one confirmed IV line, is getting extra oxygen support, and is linked to the continuous pulse oximetry with cardiac monitor.
Step 2 Identify the landmarks for needle insertion. Typically, this is done at the xiphoid process, i.e., the lower end of the sternum and directed towards the left shoulder.
Step 3 Consider using ultrasound guidance for more accurate localization, especially in cases where landmarks are difficult to palpate.
Step 4 The subxiphoid region should be surgically prepared and cleaned using the antiseptic solution.
Step 5 Administer local anesthesia to the skin and subcutaneous tissue at the insertion site to minimize discomfort.
Step 6 Create a small incision with a number 11 scalpel blade to the selected location.
Step 7 Once fluid is obtained, withdraw it from the pericardial sac into the syringe.
Step 8 Monitor the patient’s vital signs throughout the procedure, as rapid drainage of fluid can lead to hemodynamic changes.
Step 9 Five ml of normal saline should be aspirated into a 20 ml or 60 ml syringe after it is attached to the spinal needle.
Step 10 The periodic injection of maximum 1 mL of normal saline may help to maintain a needle lumen clear while the needle is being pushed.
Step 11 Place a spinal needle into the skin opening & guide it in the direction of the left shoulder. Keep a needle positioned 45 to the wall of the abdomen & 45 away from the sagittal plane midline. Whenever possible, utilize direct ultrasonographic instruction for the needle insertion procedure.
Step 1 Use the ultrasound probe to locate the pericardial effusion. This is typically seen as an anechoic space between the visceral and parietal pericardium.
Step 2 Identify the best entry site for needle insertion. This is often in the subxiphoid region, but the location can vary depending on the patient’s anatomy and the distribution of the effusion.
Step 3 Make sure the patient is positioned with their head elevated between 30 to 45 degrees. This positioning promotes the combining of fluid in the direction of the lower and front part of the body, facilitating optimal drainage of fluids. step 4 Choose a location that is nearest to the pericardial cavity. Be sure to shave the skin meticulously to prevent any potential injury.
Step 5 Numb the area with lidocaine before making a small 5 mm incision to reduce resistance when inserting the needle.
Step 6 Make that the syringe holding the lidocaine 1% is connected to the opposite side of the needle attachment on the 3-way stopcock before placing the needle to it.
Step 7 Place a needle into the subxiphoid process on left side with fluoroscopic guidance. Push the syringe & needle till its tip is positioned behind the rib cage. Proceed to advance the needle in the direction of a shoulder at an angle ranging between 15 to 20 degrees from the wall of the abdomen.
Step 8 Gently retract the needle using suction within the syringe if the electrocardiogram indicates elevation of ST following the application of lidocaine to clear the needle.
Step 9 By injecting agitated saline—also known as saline echocontrast medium—through the needle, the position of the needle is verified.
Step 10 Once a needle is positioned within the space of pericardium, a flexible guidewire with a soft, pliable tip is carefully inserted through it. Gently encircle the heart with this guidewire.
Step 11 Following this step, withdraw the needle and introduce a supple catheter equipped with numerous side apertures along this wire.
Step 12 Ultrasound-guided pericardiocentesis typically involves the use of a specific type of catheter called a pigtail catheter.
Step 13 This catheter has a curved, pigtail-shaped tip that helps to prevent tissue damage as it’s inserted into the pericardial sac surrounding the heart.
Step 14 The pericardial catheter can remain in place within the cavity for twenty-four hours, facilitating continual closed drainage. Gravity is utilized to augment the drainage process.
Step 15 Ideally, the catheter ought to be withdrawn within twenty-four hours, as prolonged placement heightens the risk of infection within the pericardial cavity.
Step 16 Fluoroscopy guided pericardiocentesis emerges as a viable alternative for managing postoperative pericardial effusion, offering precise catheter localization in difficult scenarios where contrast echocardiography proves inadequate due to surgical artifacts and pulmonary issues.
Electrocardiogram: This is the most common test used to assess heart rhythm and electrical activity. It can help diagnose arrhythmias and determine if Transcutaneous Pacing is the right treatment for you.
Echocardiogram: This method can use ultrasonic waves to give a detailed picture of the heart which can be helpful to determine the anatomy and function. It can be used to assess the efficacy of transcutaneous pacing.
Bleeding: It is one of the most prevalent consequences. The needle used for pericardiocentesis may mistakenly puncture a blood artery which can cause hemorrhage.
Infection: When the skin breaks down, microorganisms can enter the body. Both the pericardial sac and the needle insertion site are prone to infection. This danger is reduced by using sterile methods during the treatment.
Arrhythmias: Pericardiocentesis may irritate the heart muscle, which leads to irregular heartbeats called arrhythmias.
puncture of neighboring tissues: In rare situations, the needle may inadvertently puncture structures near the pericardial sac like the heart muscle or the lungs. It may lead to serious effects like a pneumothorax or heart perforation.
Accumulation of fluid: Despite effective drainage, fluid may reaccumulate in the pericardial sac. It needs the repetition of the procedure or other methods.
Hemothorax or Hemopericardium: These complications involve blood collection in the chest cavity or within the pericardial sac, typically due to bleeding during the procedure.
Local Anesthetic: Before the procedure, a local anesthetic such as lidocaine may be administered to numb the skin and underlying tissues to minimize discomfort during the insertion of the needle.
Sedatives and Analgesics: Medications like midazolam or fentanyl is used to relax the patient. It is also used to manage the pain and anxiety during the procedure.
Anti-inflammatory Agents: Nonsteroidal anti-inflammatory drugs like ibuprofen or indomethacin are used to lower the inflammation and reduce the pain linked with pericarditis. It needs pericardiocentesis.
Pain Management: Analgesics such as acetaminophen or stronger opioids may be given post-procedure to manage any discomfort or pain.
Both our subscription plans include Free CME/CPD AMA PRA Category 1 credits.
Digital Certificate PDF
On course completion, you will receive a full-sized presentation quality digital certificate.
medtigo Simulation
A dynamic medical simulation platform designed to train healthcare professionals and students to effectively run code situations through an immersive hands-on experience in a live, interactive 3D environment.
medtigo Points
medtigo points is our unique point redemption system created to award users for interacting on our site. These points can be redeemed for special discounts on the medtigo marketplace as well as towards the membership cost itself.
Community Forum post/reply = 5 points
*Redemption of points can occur only through the medtigo marketplace, courses, or simulation system. Money will not be credited to your bank account. 10 points = $1.
All Your Certificates in One Place
When you have your licenses, certificates and CMEs in one place, it's easier to track your career growth. You can easily share these with hospitals as well, using your medtigo app.