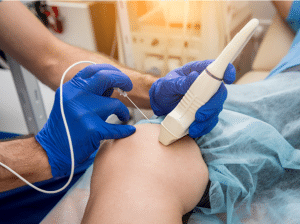
Ultrasonography-Assisted Peripheral IV (PIV) Catheter Placement
Updated :
September 27, 2024
Background
Ultrasonography-Assisted Peripheral IV (PIV) is a much more advanced technique for insertion of the catheter where conventional ways are difficult or have not delivered successful outcomes. This technique used ultrasound imaging for veins visualization, when a physician may feel difficulty in veins observation such as when dealing with an obese patient, dehydrated, edema or those that have ever used IV drugs.
Indications
Difficult venous access (DVA): Patients with small collapsed or difficult-to-palpate veins such as in obese patient or patients with edema.
History of multiple failed attempts at IV placement: Chronic conditions or treatment through chemotherapy or IV drug use resulting in vein scarring or poor vein quality.
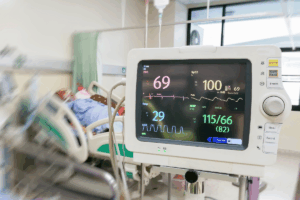
Urgent or emergent venous access: In situations where quick access is required, such as in trauma or critically ill patients. Patients who require to receive fluids or medicines quickly during emergencies.
Patients with dehydration: Veins can become less visible most of the time due to extreme flattening or collapsibility in cases of severe dehydration.
Patients with cardiovascular disease: Patients with known history of inadequate circulation or called venous insufficiency have known compromised peripheral veins.
Need for long-term venous access: People on long-term IV medications or on receiving fluids (though central access may be preferred, ultrasound can assist in extended PIV access as an alternative).
Contraindications
Pre-existing Infection or Cellulitis: Do not put a catheter through infected skin because it will allow the potential spread of infection in the bloodstream.
Proximal Vascular Thrombosis: Any veins that present with thrombosis should not be used for catheter placement for cause of propagation of the clot or compromised blood flow.
Extreme Edema: Edema is associated with poor visualization of veins through ultrasound and thus can lead to failed attempts or incorrect placement of catheter.
Vein Damage or Sclerosis: The damaged or sclerotic veins are not likely to be suitable for successful catheterization, and this can increase the incidence of vein rupture, etc.
Outcomes
Equipment
Linear Probe (High-Frequency Transducer)
Sterile Probe Cover
Sterile Gel
Peripheral IV Catheter
Tourniquet
IV Start Kit
Needle Guide
Syringe and Saline Flush
Local Anesthetic
Patient preparation
Hydration and Vein Dilation: In the preparatory stage for the procedure the patient should be encouraged to take plenty of fluids, this will help in vein dilation.
Application of a Tourniquet: Apply tourniquet near the puncture site since it is placed above the site for the cannulation to increase prominent of veins through ultrasound.
Skin Preparation Clean the Area: Chlorhexidine or alcohol should be used to clean the site to be used for insertion in a proper method.
Sterility: Basics steps like wearing sterile gloves and an aseptic ultrasound probe cover where necessary to prevent touching the site of infection.
Probe and Gel Preparation: Put gel on the skin above the nearer tissue interface of the structure that is to be scanned which enhances the image quality and the contact between the probe and the skin.
Probe Orientation: Ensure that the ultrasound probe is well positioned in a way that visibility the veins to the best. A higher frequency of linear probes (10-15 MHz) should be used to improve the superficial structures’ resolution.
Patient Instructions
Communicate: Explain to the patient why the process is being done especially the use of ultrasound in helping to improve precision and decrease pain.
Stillness: Tell the patient to keep as still as possible for a few minutes to ensure no labelling of the vein or interference with the image.
Patient position:
Arm Positioning:
Supine Position: The patient should be in comfortable position in supine position with the arm straight alongside the body and slightly abducted.
This position exposes the veins conveniently in the upper arm, forearm, or antecubital fossa.
Hand or Forearm Support: To reduce probabilities of the arm moving during a specific procedure is being done, it can be placed on a pillow or a flat plane.
Vein Elevation: With the arm raised, the veins get enlarged and hence there is easy visualization; this is ensured by placing a towel or a cushion under the arm.
Ultrasound guided peripheral intravenous catheter
Step 1-Pre-procedure Preparation:
Patient Selection: This method is typically for patients with poor peripheral veins, and when using other conventional techniques failed.
Patient Positioning and Setup: Position the patient correctly most preferably lying down with the arm outstretched as this will make work easier.
Tourniquet Application: After the needle insertion apply tourniquet to increase the size of the veins in the area for easier identification during the ultrasound examination.
Ultrasound Preparation Probe Selection: Choose a high-frequency linear transducer which provides good superficial resolution.
Step 2-Probe Positioning:
Transverse (short axis) view: This configuration gives the probe a cross-section view of the vessel by placing it perpendicular to the vein.
Longitudinal (long-axis) view: The probe is angled parallel to the vein to allow for a long axis view which is more helpful in viewing the needle path.
Set Depth and Gain: The ultrasound machine depth and gain are adjusted to have optimal visualization of the vein and surrounding structures. The vein would appear as a dark or anechoic circular or oval-shaped structure on the screen.
Step 3-Vein Identification Compression Test:
Optimate the use of the ultrasound probe to compress the vein, making a difference between veins and arteries.
With compression, veins will disappear altogether while arteries remain discernible; they may also pulsate.
Best Vein Selection: To find a vein of at least 0.4 centimetres in diameter, which straight and close to the surface, ideally not more profound than 1.5 centimetres beneath the surface of the skin.
Sterile Technique: Wash the skin over the insertion site with an antiseptic solution. Clean the probe using sterile gel and in cases where sterility is required, cover the probe will a sterile cover.
It is important to wear sterile gloves that will ensure that the process and the catheter itself remain sterile.
Step 4-Needle Insertion:
In-plane Technique (long-axis view): It offered the complete anatomical view right from the skin to the point of insertion through the vein.
Make sure that the needle is touching the probe while parallel to it, where the tip is visible all the time as the needle moves towards the desired mark.
Out-of-plane Technique (short-axis view): The needle is shown as a graph that is a single dot moving across the section of the vein.
For the initial part of the needle insertion, under a shallow angle against the skin surface in a range of 10-30° to the plane of the ultrasound image.
Guided Advancement: When the tip of the needle enters the vein, turn the needle slightly away from the skin and slide forward slowly.
Step 5-Confirmation of Vein Entry:
Usually, when the needle enters the vein there will be a flash of blood into the catheter hub.
When using the long axis view it ensure you to see the needle tip within the vein’s lumen.
Once the needle tip is inside the vein, advance the catheter of the needle into the vein.
Step 6-Catheter Insertion:
Once you are certain that the catheter is inserted into the vein, advance the catheter entirely while withdrawing the needle.
Tie the catheter up tightly with sterile dressing and tape.
Step 7-Post-procedure Care:
Flush the catheter with saline to check for patency.
Harness the IV line using transparent dressing and tape.
Remove the tourniquet and test the function of the IV line by monitoring the flow of fluids with the catheter.
Complications
Infection: Catheter-Associated Infections: While less frequent there is always a possibility of spreading an infection where sterile methods have been violated.
Localized Infection: Since local infection may develop close to the site of catheter insertion, erythema, hyperthermia and edema are early sign of the infection.
Phlebitis and Thrombophlebitis
Phlebitis: Inflammation of the vein can be caused by factors like mechanical irritation or improper positioning of the catheter.
Thrombophlebitis: Thrombophlebitis, an inflammation of the vein at the catheter site accompanied by the formation of a blood clot, might be confirmed by pain, as well as swelling and reddening of the affected area.
Arterial Puncture: Puncture of a blood vessel by mistake instead of the intended vein is hazardous in causing hematoma and bleeding particularly where the vasculature is not magnified during image-guided ultrasound.
Hematoma: Ultrasound guidance minimizes the chances of hematoma, but the accidental puncture of the veins or arteries also leads to bleeding and local edema.
Nerve Injury: Vein and nerve are in proximity, especially the deeper veins of the upper limb if the needle inadvertently damages a nearby nerve. This could result in pain, numbness, or motor weakness.
Catheter Malposition: It may sometimes fail even when the assistance of an ultrasound guide is provided because the catheter tip is placed incorrectly about the vein. Fluid exfiltrates in soft tissue rather than within the vein. This can cause swelling, tissue damage, or extreme pain.
»
Home » Procedure » Ultrasonography-Assisted Peripheral IV (PIV) Catheter Placement
Ultrasonography-Assisted Peripheral IV (PIV) Catheter Placement
Updated :
September 27, 2024
Ultrasonography-Assisted Peripheral IV (PIV) is a much more advanced technique for insertion of the catheter where conventional ways are difficult or have not delivered successful outcomes. This technique used ultrasound imaging for veins visualization, when a physician may feel difficulty in veins observation such as when dealing with an obese patient, dehydrated, edema or those that have ever used IV drugs.
Difficult venous access (DVA): Patients with small collapsed or difficult-to-palpate veins such as in obese patient or patients with edema.
History of multiple failed attempts at IV placement: Chronic conditions or treatment through chemotherapy or IV drug use resulting in vein scarring or poor vein quality.
Urgent or emergent venous access: In situations where quick access is required, such as in trauma or critically ill patients. Patients who require to receive fluids or medicines quickly during emergencies.
Patients with dehydration: Veins can become less visible most of the time due to extreme flattening or collapsibility in cases of severe dehydration.
Patients with cardiovascular disease: Patients with known history of inadequate circulation or called venous insufficiency have known compromised peripheral veins.
Need for long-term venous access: People on long-term IV medications or on receiving fluids (though central access may be preferred, ultrasound can assist in extended PIV access as an alternative).
Pre-existing Infection or Cellulitis: Do not put a catheter through infected skin because it will allow the potential spread of infection in the bloodstream.
Proximal Vascular Thrombosis: Any veins that present with thrombosis should not be used for catheter placement for cause of propagation of the clot or compromised blood flow.
Extreme Edema: Edema is associated with poor visualization of veins through ultrasound and thus can lead to failed attempts or incorrect placement of catheter.
Vein Damage or Sclerosis: The damaged or sclerotic veins are not likely to be suitable for successful catheterization, and this can increase the incidence of vein rupture, etc.
Linear Probe (High-Frequency Transducer)
Sterile Probe Cover
Sterile Gel
Peripheral IV Catheter
Tourniquet
IV Start Kit
Needle Guide
Syringe and Saline Flush
Local Anesthetic
Patient preparation
Hydration and Vein Dilation: In the preparatory stage for the procedure the patient should be encouraged to take plenty of fluids, this will help in vein dilation.
Application of a Tourniquet: Apply tourniquet near the puncture site since it is placed above the site for the cannulation to increase prominent of veins through ultrasound.
Skin Preparation Clean the Area: Chlorhexidine or alcohol should be used to clean the site to be used for insertion in a proper method.
Sterility: Basics steps like wearing sterile gloves and an aseptic ultrasound probe cover where necessary to prevent touching the site of infection.
Probe and Gel Preparation: Put gel on the skin above the nearer tissue interface of the structure that is to be scanned which enhances the image quality and the contact between the probe and the skin.
Probe Orientation: Ensure that the ultrasound probe is well positioned in a way that visibility the veins to the best. A higher frequency of linear probes (10-15 MHz) should be used to improve the superficial structures’ resolution.
Patient Instructions
Communicate: Explain to the patient why the process is being done especially the use of ultrasound in helping to improve precision and decrease pain.
Stillness: Tell the patient to keep as still as possible for a few minutes to ensure no labelling of the vein or interference with the image.
Patient position:
Arm Positioning:
Supine Position: The patient should be in comfortable position in supine position with the arm straight alongside the body and slightly abducted.
This position exposes the veins conveniently in the upper arm, forearm, or antecubital fossa.
Hand or Forearm Support: To reduce probabilities of the arm moving during a specific procedure is being done, it can be placed on a pillow or a flat plane.
Vein Elevation: With the arm raised, the veins get enlarged and hence there is easy visualization; this is ensured by placing a towel or a cushion under the arm.
Ultrasound guided peripheral intravenous catheter
Step 1-Pre-procedure Preparation:
Patient Selection: This method is typically for patients with poor peripheral veins, and when using other conventional techniques failed.
Patient Positioning and Setup: Position the patient correctly most preferably lying down with the arm outstretched as this will make work easier.
Tourniquet Application: After the needle insertion apply tourniquet to increase the size of the veins in the area for easier identification during the ultrasound examination.
Ultrasound Preparation Probe Selection: Choose a high-frequency linear transducer which provides good superficial resolution.
Step 2-Probe Positioning:
Transverse (short axis) view: This configuration gives the probe a cross-section view of the vessel by placing it perpendicular to the vein.
Longitudinal (long-axis) view: The probe is angled parallel to the vein to allow for a long axis view which is more helpful in viewing the needle path.
Set Depth and Gain: The ultrasound machine depth and gain are adjusted to have optimal visualization of the vein and surrounding structures. The vein would appear as a dark or anechoic circular or oval-shaped structure on the screen.
Step 3-Vein Identification Compression Test:
Optimate the use of the ultrasound probe to compress the vein, making a difference between veins and arteries.
With compression, veins will disappear altogether while arteries remain discernible; they may also pulsate.
Best Vein Selection: To find a vein of at least 0.4 centimetres in diameter, which straight and close to the surface, ideally not more profound than 1.5 centimetres beneath the surface of the skin.
Sterile Technique: Wash the skin over the insertion site with an antiseptic solution. Clean the probe using sterile gel and in cases where sterility is required, cover the probe will a sterile cover.
It is important to wear sterile gloves that will ensure that the process and the catheter itself remain sterile.
Step 4-Needle Insertion:
In-plane Technique (long-axis view): It offered the complete anatomical view right from the skin to the point of insertion through the vein.
Make sure that the needle is touching the probe while parallel to it, where the tip is visible all the time as the needle moves towards the desired mark.
Out-of-plane Technique (short-axis view): The needle is shown as a graph that is a single dot moving across the section of the vein.
For the initial part of the needle insertion, under a shallow angle against the skin surface in a range of 10-30° to the plane of the ultrasound image.
Guided Advancement: When the tip of the needle enters the vein, turn the needle slightly away from the skin and slide forward slowly.
Step 5-Confirmation of Vein Entry:
Usually, when the needle enters the vein there will be a flash of blood into the catheter hub.
When using the long axis view it ensure you to see the needle tip within the vein’s lumen.
Once the needle tip is inside the vein, advance the catheter of the needle into the vein.
Step 6-Catheter Insertion:
Once you are certain that the catheter is inserted into the vein, advance the catheter entirely while withdrawing the needle.
Tie the catheter up tightly with sterile dressing and tape.
Step 7-Post-procedure Care:
Flush the catheter with saline to check for patency.
Harness the IV line using transparent dressing and tape.
Remove the tourniquet and test the function of the IV line by monitoring the flow of fluids with the catheter.
Complications
Infection: Catheter-Associated Infections: While less frequent there is always a possibility of spreading an infection where sterile methods have been violated.
Localized Infection: Since local infection may develop close to the site of catheter insertion, erythema, hyperthermia and edema are early sign of the infection.
Phlebitis and Thrombophlebitis
Phlebitis: Inflammation of the vein can be caused by factors like mechanical irritation or improper positioning of the catheter.
Thrombophlebitis: Thrombophlebitis, an inflammation of the vein at the catheter site accompanied by the formation of a blood clot, might be confirmed by pain, as well as swelling and reddening of the affected area.
Arterial Puncture: Puncture of a blood vessel by mistake instead of the intended vein is hazardous in causing hematoma and bleeding particularly where the vasculature is not magnified during image-guided ultrasound.
Hematoma: Ultrasound guidance minimizes the chances of hematoma, but the accidental puncture of the veins or arteries also leads to bleeding and local edema.
Nerve Injury: Vein and nerve are in proximity, especially the deeper veins of the upper limb if the needle inadvertently damages a nearby nerve. This could result in pain, numbness, or motor weakness.
Catheter Malposition: It may sometimes fail even when the assistance of an ultrasound guide is provided because the catheter tip is placed incorrectly about the vein. Fluid exfiltrates in soft tissue rather than within the vein. This can cause swelling, tissue damage, or extreme pain.
Both our subscription plans include Free CME/CPD AMA PRA Category 1 credits.
Digital Certificate PDF
On course completion, you will receive a full-sized presentation quality digital certificate.
medtigo Simulation
A dynamic medical simulation platform designed to train healthcare professionals and students to effectively run code situations through an immersive hands-on experience in a live, interactive 3D environment.
medtigo Points
medtigo points is our unique point redemption system created to award users for interacting on our site. These points can be redeemed for special discounts on the medtigo marketplace as well as towards the membership cost itself.
Community Forum post/reply = 5 points
*Redemption of points can occur only through the medtigo marketplace, courses, or simulation system. Money will not be credited to your bank account. 10 points = $1.
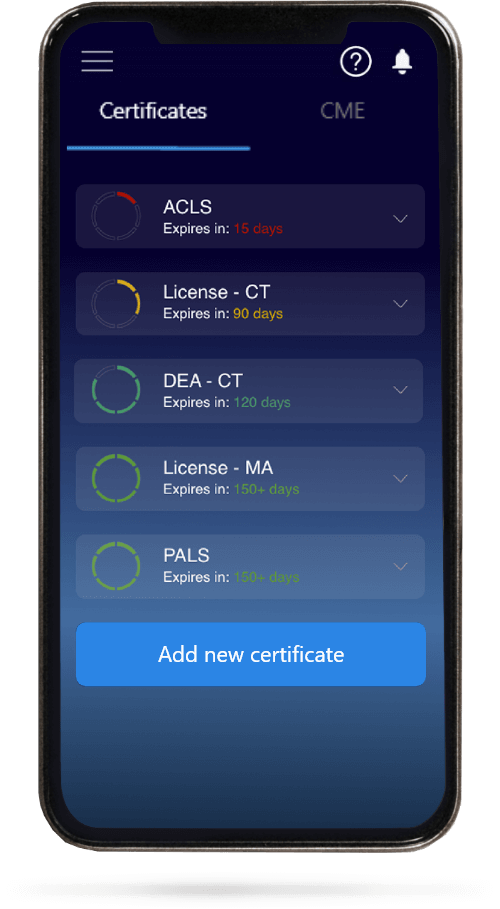
All Your Certificates in One Place
When you have your licenses, certificates and CMEs in one place, it's easier to track your career growth. You can easily share these with hospitals as well, using your medtigo app.